


Sidechaining in Ableton Live 12 gets talked about constantly, but most explanations stop at the same surface-level walkthrough. Load a compressor, select a kick (if you need a few more great kicks, check out the free sample pack we made with Black Octopus), dial in some settings, and move on. That approach works, but it rarely explains why sidechaining feels inconsistent across projects or why certain tracks lose momentum the moment the kick drops out.
In my own sessions, sidechaining plays a much larger role than volume control. I treat it as an arrangement and groove management tool that shapes how energy moves through a track from section to section. Ableton Live 12 makes this easier to manage thanks to cleaner routing and more predictable behavior across group tracks, but the real gains come from how you design the system rather than which device you load.
Jump to these sections
This guide walks through how I actually sidechain in Live 12, why I rely heavily on ghost kick routing, how I approach track-level versus bus-level sidechain, and when I skip compressor-based sidechaining entirely.
The goal here is consistency, flow, and control across an entire arrangement rather than chasing a single pumping effect.
How To Sidechain In Ableton 12: The Basics
Sidechaining, I would argue, is one of those mid-level mixing skills. If you’re still struggling with the basics, I would recommend checking out Native Instruments’ mixing guide, as it really does cover them better than anyone else. Sidechaining can sound complicated if you only ever hear it explained as “that pumping thing,” but the core idea is simple. You take a signal from one track, and you use it to control how an effect behaves on another track.
Ableton Live 12 makes this straightforward because most native devices that support sidechaining expose the routing in a consistent way, so once you learn the pattern, you can apply it to compressors, gates, and a handful of creative devices. I will show you a basic walkthrough first, then point out a couple of practical choices that make the setup more reliable in real sessions.
Keep in mind that sidechaining is a routing concept, and the audible result depends on the device you use and how you set it. When you understand that, you stop treating sidechain as a genre trick and start using it as a repeatable workflow.
Step 1 – Understand what “sidechain” means inside Live 12
In Ableton, sidechaining means an audio or MIDI signal from one track becomes the control input for a device on another track. The track providing the control signal is the trigger, and the track hosting the device is the target.
The trigger track does not need to be loud, and it does not even need to be audible in the arrangement, because it can exist purely as a control signal. The target track is where you place the device that reacts, and that device will change its behavior based on the trigger’s level or notes, depending on the device. This is why sidechaining can mean ducking with a compressor, but it can also mean driving a resonator, a filter follower, or any other processor that offers an external input.
Once you frame it this way, you can sidechain almost anything in Live, as long as the device supports external routing.
Step 2 – Set up the classic ducking sidechain with Compressor
This is the most common use case because it is fast, it is predictable, and it is easy to hear.
Start by putting Ableton’s Compressor on the track you want to get quieter when something else happens, which is usually a bass, synth, or percussion bus.
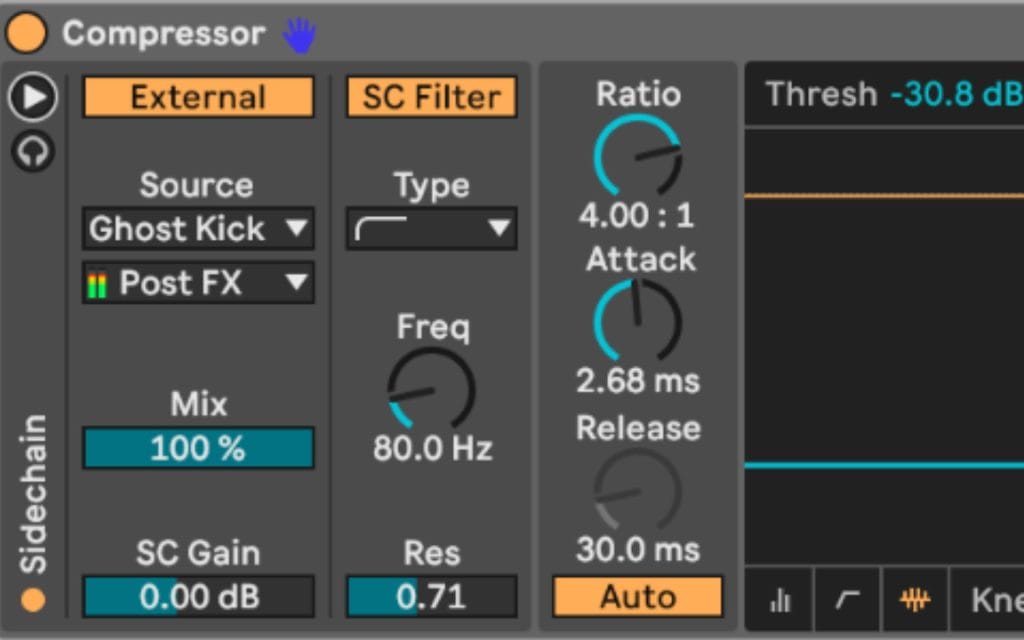
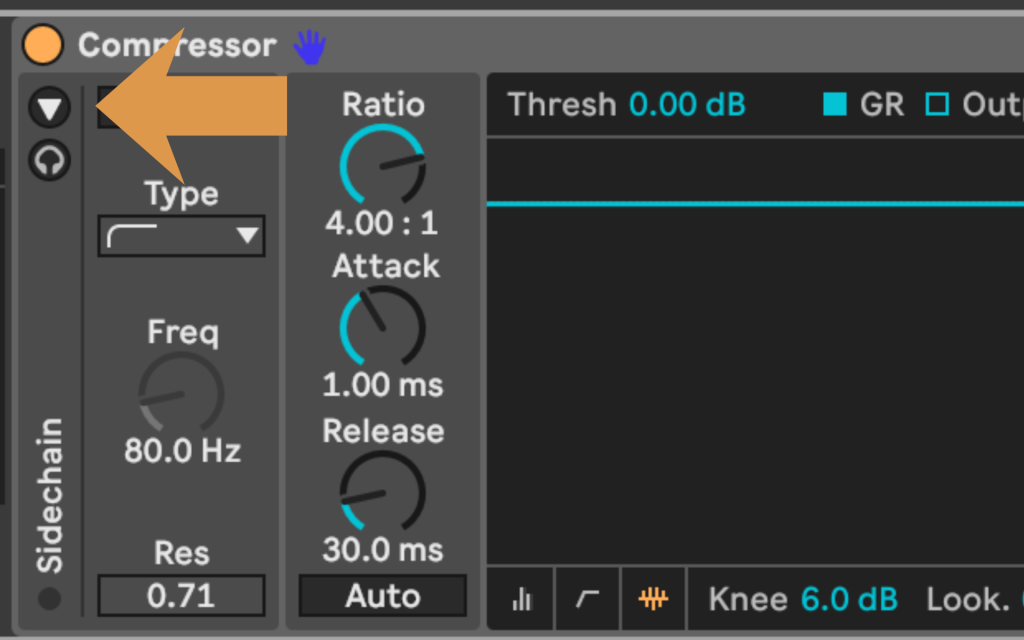
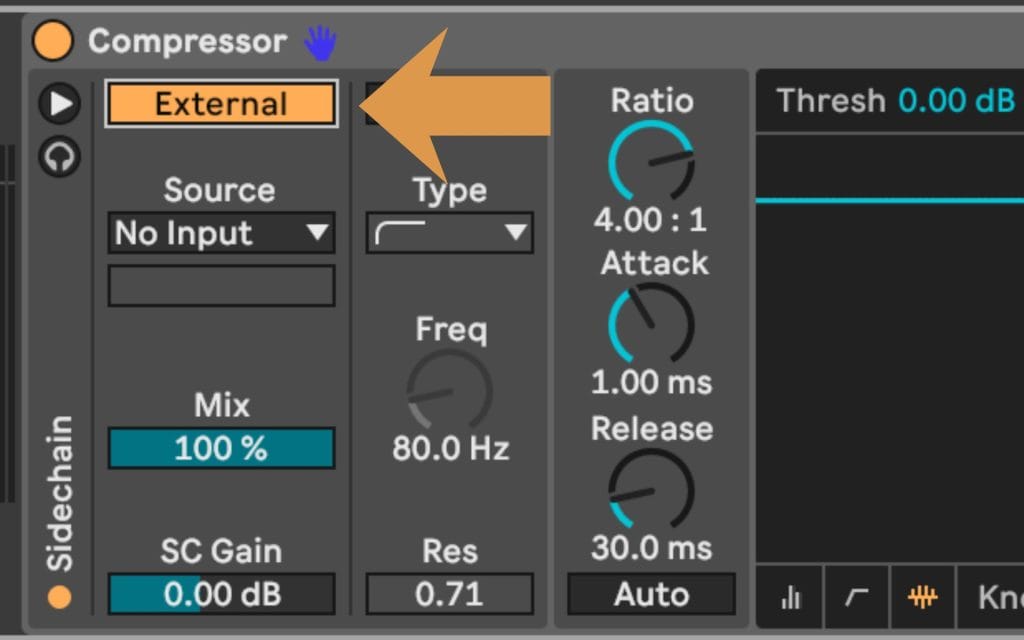
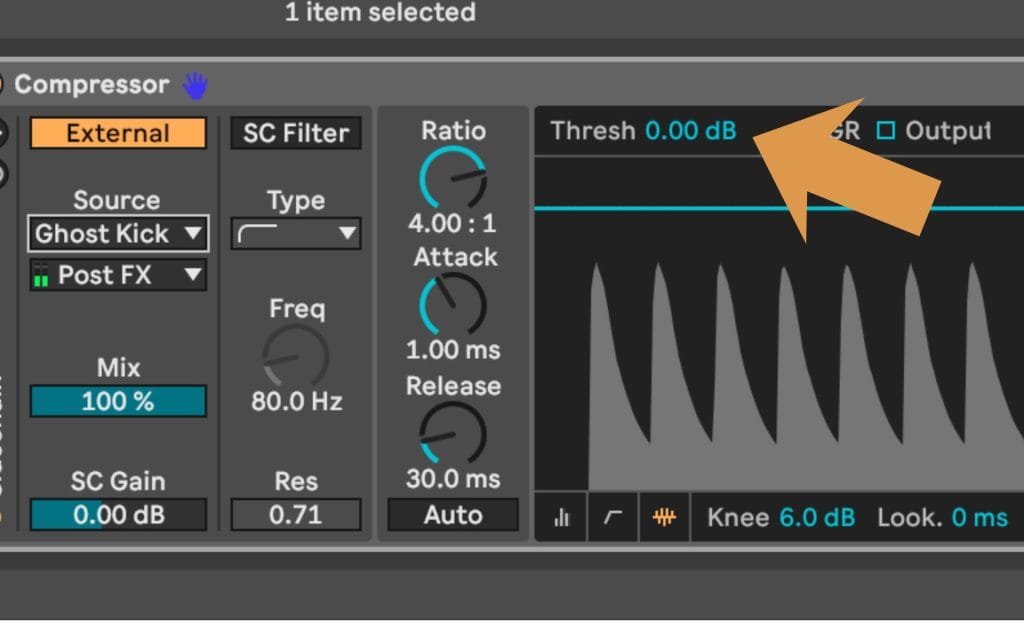
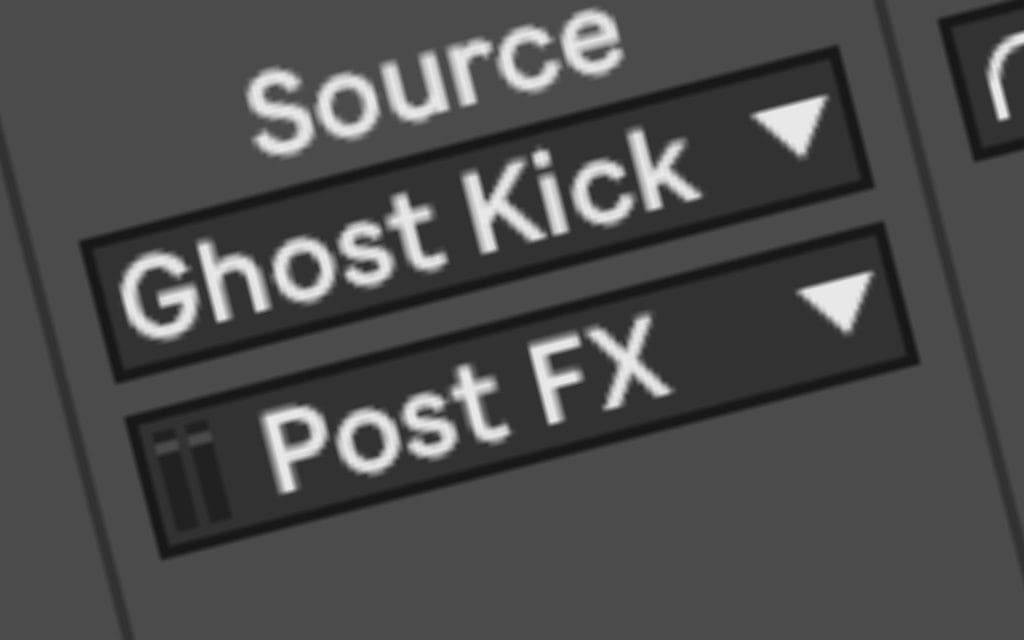
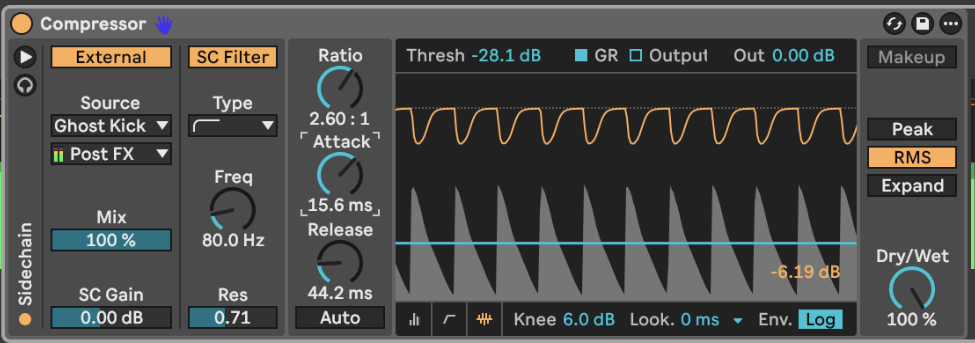
After the Compressor loads, click the sidechain section so it expands, then enable Sidechain. In the “Audio From” dropdown, choose the track that will trigger the ducking, which is usually your kick drum track. In the second dropdown, choose where the signal comes from in the chain, and pick Pre FX if you want the cleanest and most consistent trigger signal.
At this point, you have routing set up, and the Compressor is now listening to the kick while processing the target track.
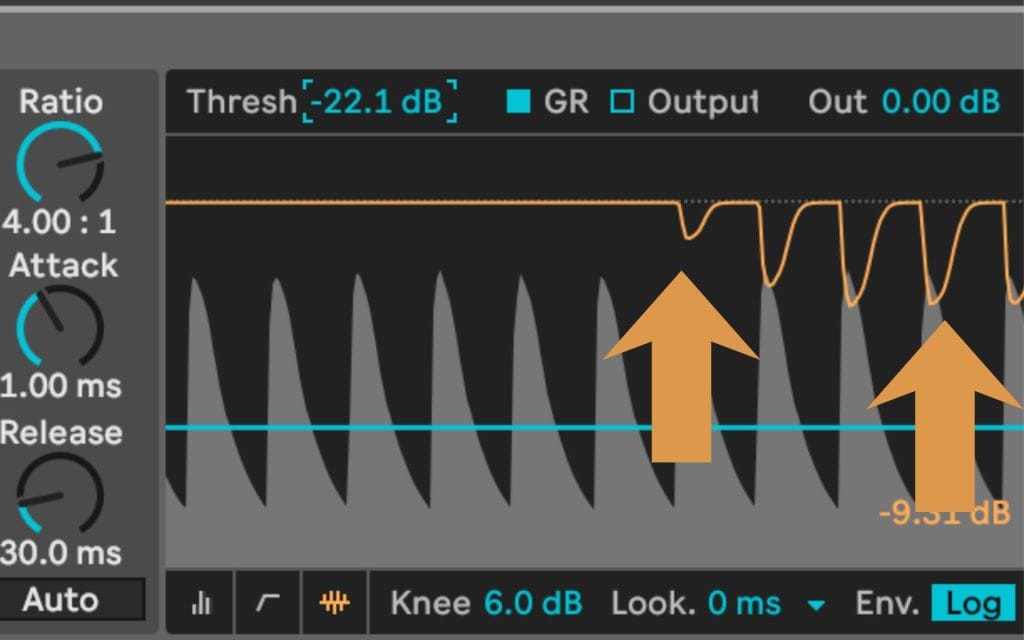
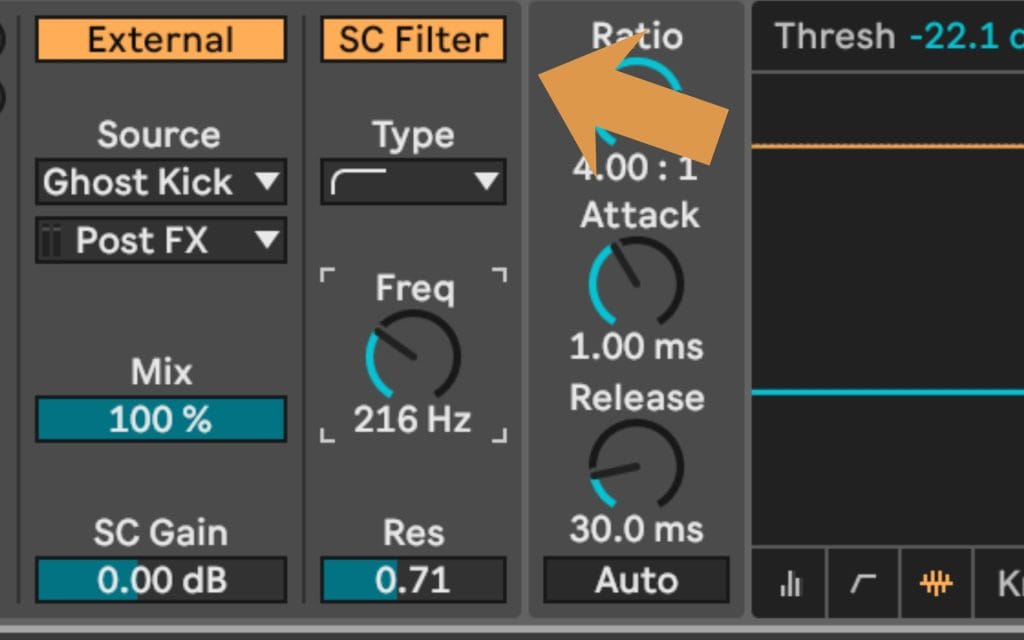
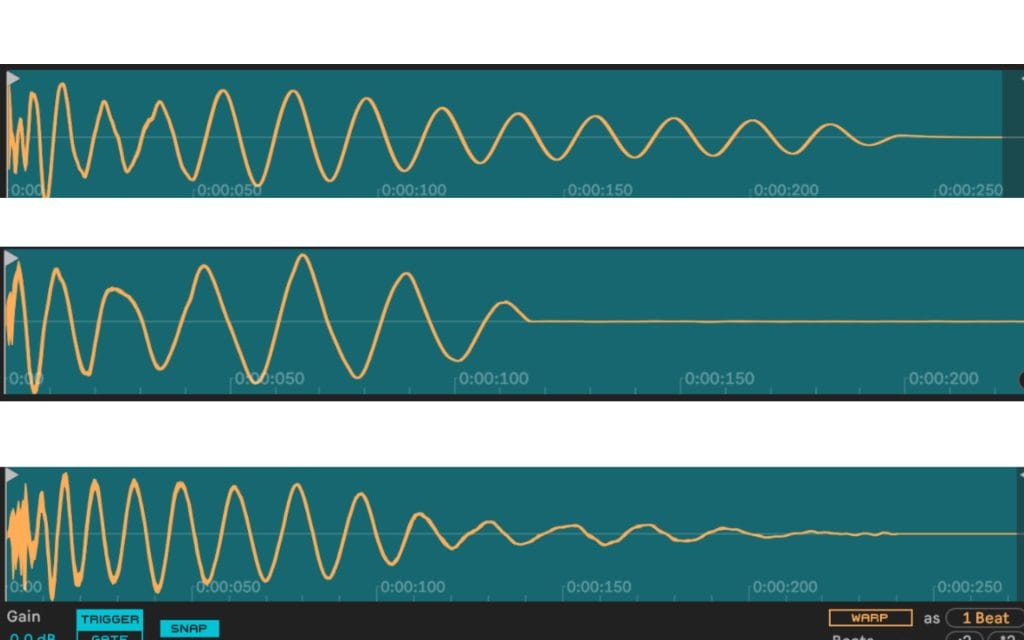
Now dial in the movement. Lower the Threshold until you see gain reduction, then adjust Ratio to control how strong the ducking feels. Set Attack fast if you want the duck to start right on the kick transient, and set Release based on how quickly you want the volume to recover.
If you want something subtle, you keep the gain reduction small and you use moderate settings, then you listen to how it interacts with the groove rather than staring at the meter. If you want a stronger rhythmic pull, you lower the threshold more and lengthen the release so the recovery creates a longer swell between hits.
The key is that the Compressor is reducing the target track in response to the kick, and Live 12 makes this consistent as long as your routing stays stable.
Step 3 – Use the Sidechain EQ to focus what triggers the compressor
Ableton’s Compressor includes a Sidechain EQ section, and it is one of the most overlooked controls in beginner guides. The Sidechain EQ does not change the sound of your kick, and it changes what the compressor reacts to. If your kick has a lot of low end tail, the compressor may stay engaged longer than you expect, and that can make the ducking feel sluggish.
By filtering the sidechain input, you can bias the compressor toward the part of the kick that matters for timing, often the click and upper body of the transient.
To use it, turn on the EQ in the sidechain section, then apply a high-pass filter so deep sub does not dominate the detector. You can also narrow the response around the range that gives you the most consistent trigger, especially if the kick sample changes later. This step tends to make sidechain behavior feel more repeatable across sessions, and it helps you avoid chasing settings that only worked because one specific kick happened to fit the compressor’s detector behavior.
Step 4 – Check your routing so the sidechain keeps working
Two quick checks prevent a lot of confusion. First, confirm that the device with sidechain enabled is on the correct track, which is the track you want to be affected, not the trigger track.
Second, confirm that “Audio From” is set to the correct source and that you are not accidentally feeding the track into itself. If you want the trigger to stay consistent, use Pre FX, because Post FX can change if you later EQ, saturate, or clip the kick.
If you do not hear ducking, lower the threshold until gain reduction becomes obvious, then bring it back up after you confirm the routing works. Once you confirm it is reacting, you can fine tune settings with smaller moves.
Step 5 – Do the same thing with Gate for a harder rhythmic cut
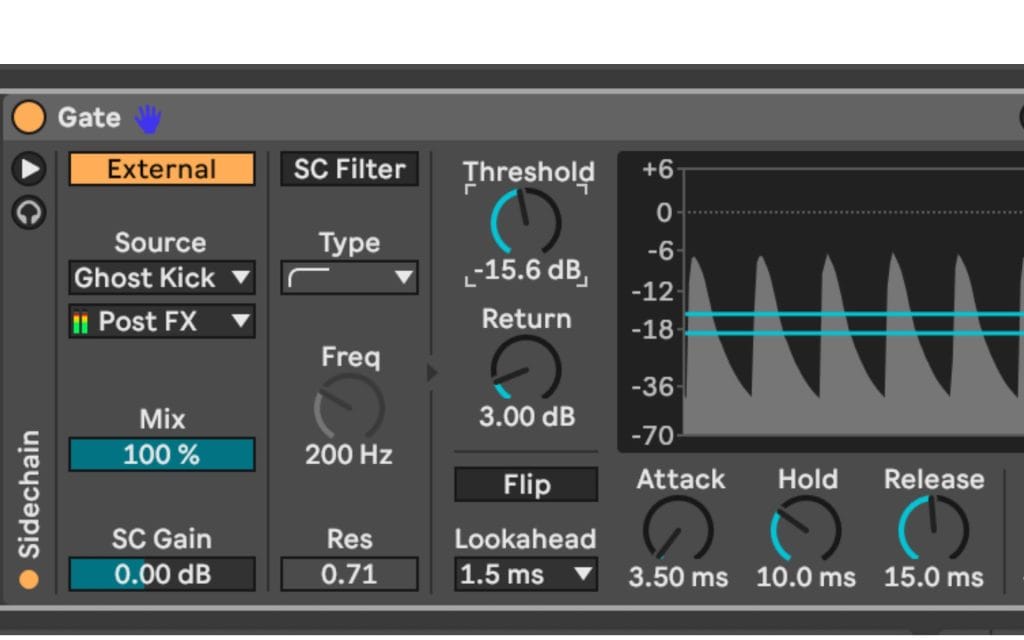
A Gate can also be sidechained, and it creates a different type of movement.
A compressor turns the target down based on the trigger’s level, and a gate can clamp down more decisively depending on how you set it. Drop a Gate on the same target track, enable Sidechain, and select the kick in the “Audio From” dropdown, the same way you did with Compressor.
Then set the Threshold so the gate opens or closes in time with the kick, and adjust Attack, Hold, and Release to shape the rhythm. This approach can create a more obvious rhythmic chopping effect, and it can be useful on pads, textures, and longer elements where you want a more deliberate rhythmic pattern. It can also be easier to hear than compressor ducking when you are learning, because the level change tends to be more extreme.
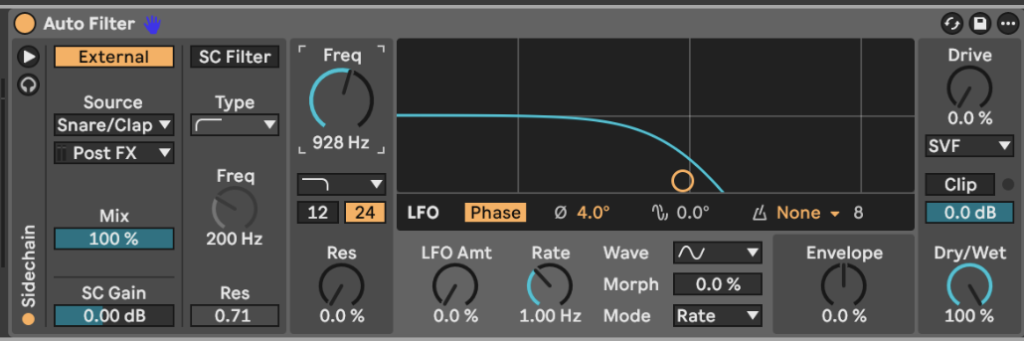
Step 6 – Use sidechaining for creative devices, not only ducking
Ducking is the entry point, but sidechaining in Ableton is bigger than dynamics.
Some devices can take an external input and use it to drive their processing behavior, which lets you make one element react to another in more musical ways.
The setup still follows the same pattern, which is you load the device on the target track, then you choose the sidechain input or external input inside the device, then you pick the source track. After that, you can mute the source track if you only want it as a control signal, and the target will still react as long as the routing stays active. This is one of those workflows that feels small the first time you do it, and then it becomes a go-to move because it keeps your arrangement cohesive without adding extra automation lanes everywhere.
Step 7 – My practical default move in Live 12, the ghost trigger track
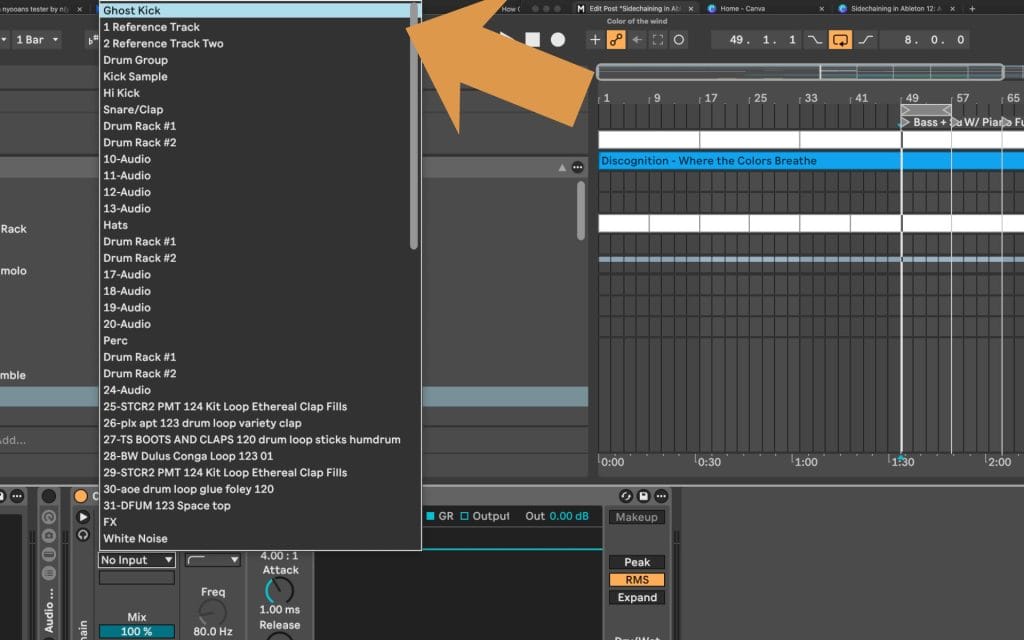
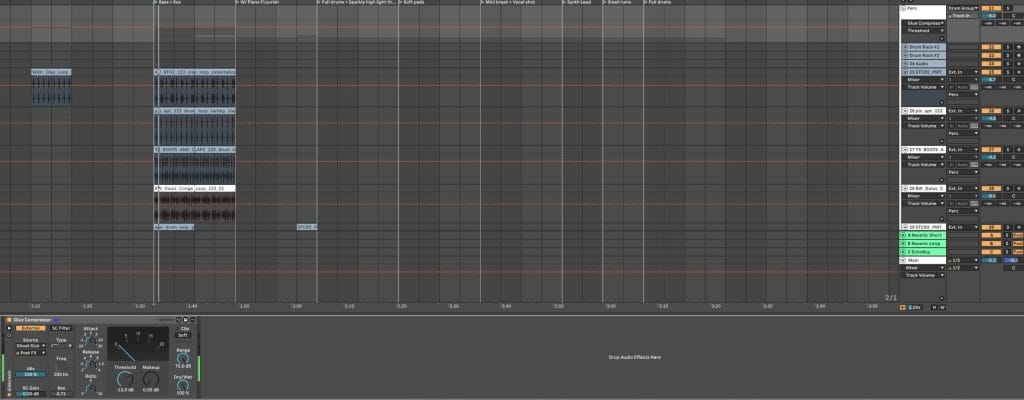
Once you understand the basic walkthrough, the next best step is creating a dedicated trigger track. You put a short kick sample on it, you keep it muted, and you use it as the sidechain source across your whole project. This keeps ducking consistent even when your audible kick pattern drops out for a fill or a breakdown, and it keeps your sidechain behavior stable while you audition different kick samples.
It also gives you an easy way to automate sidechain intensity across the arrangement, because riding the trigger track level changes how hard the compressor reacts. In Live 12, this workflow stays clean because routing remains easy to read, and you can keep the trigger track organized in your template so it becomes part of your default session.
If you want sidechain that behaves the same every time, this is the setup that gets you there.
Quick checklist if your sidechain feels wrong
- If ducking feels late, shorten Attack and check that lookahead or latency-heavy processing is not changing timing.
- If ducking lasts too long, shorten Release and consider filtering low end in the Sidechain EQ.
- If sidechain changes when you swap kicks, move to a consistent trigger, or use the Sidechain EQ to stabilize the detector.
- If the effect disappears in breakdowns, use a muted trigger track that keeps playing through those sections.
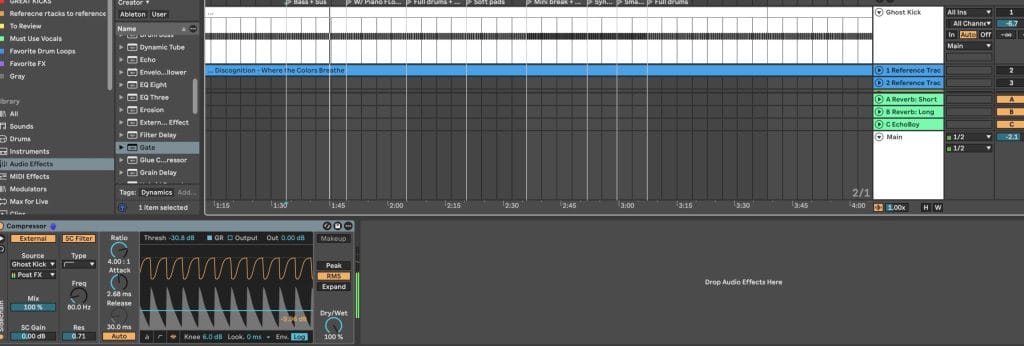
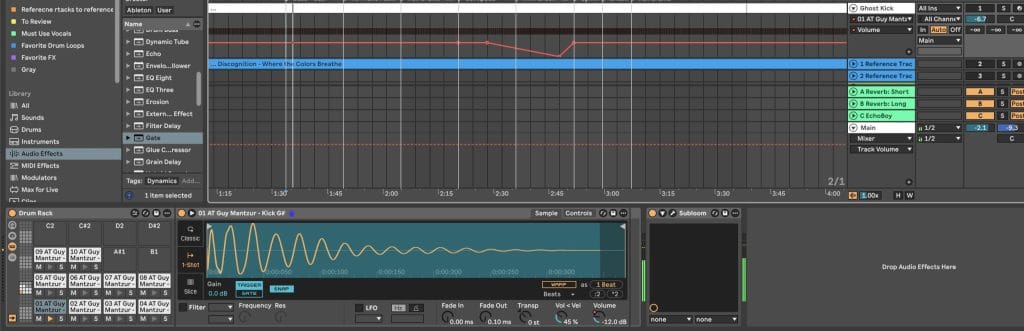
Why I Rely on a Ghost Kick for Sidechaining in Ableton 12
In most of my projects, sidechaining gets triggered by a dedicated ghost kick channel rather than the audible kick itself. That ghost channel usually contains a short, clean kick sample that stays muted, and it exists purely to drive sidechain behavior across the session. This setup solves several problems that show up constantly during production.
One of the biggest giveaways of an underdeveloped track shows up when the kick drops out and the entire mix swells in volume. The groove loosens, the energy shifts abruptly, and the momentum that carried the track forward disappears. By routing sidechain from a ghost kick that continues playing through those sections, the underlying pumping behavior stays intact even when the audible kick leaves the arrangement.
Another benefit shows up during sound selection. Kick samples vary wildly in transient length and sub tail behavior, and those differences directly affect how a compressor reacts. A kick with a longer low-frequency tail can extend gain reduction longer than expected, even when that tail stays hard to hear on smaller monitoring setups. When sidechain depends on the audible kick, every kick swap risks breaking the feel you already dialed in.
A ghost kick removes that variability. The sidechain trigger stays consistent across the entire project, which means the groove remains stable while you audition different kicks. It also opens up automation possibilities since you can ride the ghost kick level over time, which effectively lets you automate sidechain intensity as the arrangement evolves.
Using Sidechain to Protect Groove and Momentum
Sidechaining often gets framed as a way to create space, but in practice I lean on it to preserve groove continuity. When pumping stays consistent beneath the surface, transitions feel intentional and sections connect more naturally. Ableton Live 12 handles this especially well when routing remains simple and predictable.
Keeping the sidechain trigger active through breakdowns helps maintain forward motion, even when elements strip back. Pads, textures, and percussion continue breathing in time with the grid, and the track never feels like it suddenly relaxed its grip. That consistency matters more than exaggerated movement.
This approach also allows energy to build and release gradually instead of collapsing and restarting. The listener experiences flow rather than interruption, which translates far better on a club system and during longer listening sessions. Sidechain becomes part of the rhythmic foundation rather than an effect layered on top.
Track-Level Sidechaining for Rhythmic Detail
At the track level, I rarely apply identical sidechain settings across the board. Different rhythmic elements call for different amounts of movement, and treating them individually keeps the groove from flattening out. In a typical session, a bongo loop might receive light sidechain, a shaker loop might need something more pronounced, and a swung percussion element might sit somewhere between those two.
These choices come down to rhythmic density and how each element interacts with the kick pattern. Some loops benefit from being tucked out of the way slightly, while others need to maintain presence to keep the groove alive. Ableton Live 12 makes these micro adjustments easy to manage without losing routing clarity.
Working this way also prevents over-compression at the bus stage. When individual elements already move appropriately, the summed result feels controlled rather than heavy-handed. Track-level sidechain becomes about shaping feel rather than forcing uniform behavior.
Bus-Level Sidechaining to Lock Everything Together
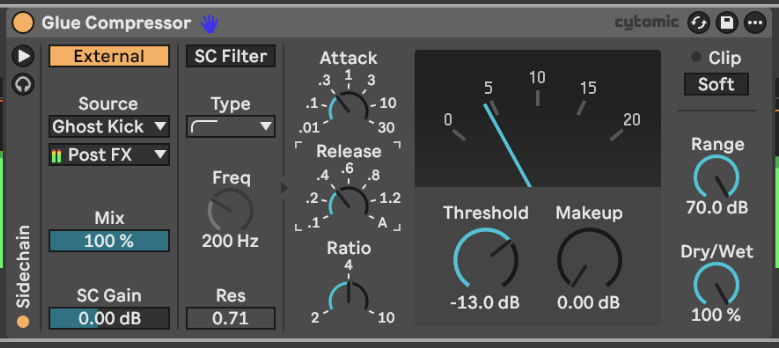
Once individual percussion elements behave the way I want, they usually get routed into a percussion bus. That bus receives a very light amount of sidechain compression, often only two or three decibels of gain reduction. The purpose here has nothing to do with clearing space and everything to do with cohesion.
A gentle bus-level sidechain pulls the entire rhythmic section toward the kick without flattening internal dynamics. The groove tightens, the timing feels unified, and the kick gains authority without overpowering the mix. Ableton Live 12 handles group track sidechaining reliably, which makes this step far easier to trust than in older sessions.
Using minimal gain reduction keeps the result musical and avoids exaggerated pumping. The movement stays present, but it supports the rhythm instead of dominating it. This subtle approach scales well across larger arrangements and layered percussion sections.
Why Ghost Kicks Solve Inconsistent Sidechain Behavior

Sidechain inconsistency often traces back to kick selection rather than compressor settings.
Kick samples with long sub tails or uneven transient shapes can trigger compression in unpredictable ways, especially when monitoring systems fail to reveal those low-frequency details clearly. The compressor reacts to energy that the ear barely registers, and the groove suffers as a result.
A ghost kick sidesteps that entire issue. Because the trigger remains short and controlled, the compressor responds the same way every time. Sidechain timing stays locked, release behavior remains predictable, and the pumping effect stays consistent across sound changes.
This also speeds up the creative process. Instead of reworking compression settings every time a kick changes, you can focus on musical decisions and arrangement flow. Consistency at the trigger level removes friction throughout the session.
When I Avoid Compressor-Based Sidechaining Entirely
Sidechaining everything rarely leads to a stronger track.
In many cases, leaving certain elements untouched adds depth and contrast that heavy sidechain strips away. Pads, textures, and ear-level details often benefit from breathing freely in the background while rhythmic elements handle the pumping.
Allowing some parts to float creates spatial interest and keeps the arrangement from feeling mechanically uniform. The groove stands out more clearly when movement exists alongside stillness. Ableton Live 12 offers plenty of tools that make this balance easy to manage.
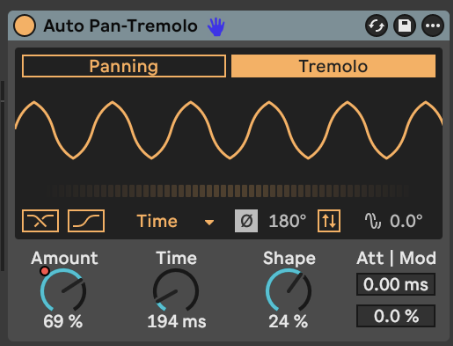
For rhythmic movement without compression, modulation tools can step in. Using tremolo style modulation through devices like Auto Pan set to a fixed phase creates beat-locked movement that remains fully controllable. Automation over depth and rate can transform a static pad into a dynamic layer across transitions without relying on sidechain compression at all.
Sidechaining as an Arrangement Tool in Live 12

The longer I work with sidechain, the more it feels tied to arrangement rather than mixing. Early decisions about ghost kick routing, trigger consistency, and where movement belongs shape how the entire track unfolds. Ableton Live 12 supports this mindset by keeping routing clear and behavior predictable across devices and groups.
Sidechain becomes something you design once and then shape over time rather than constantly re-adjust. Automation, group routing, and consistent triggers allow sidechain behavior to evolve naturally alongside the music. That evolution keeps the track engaging without calling attention to the technique itself.
When sidechain supports flow rather than chasing impact, the result translates better across systems and contexts. The groove holds together, transitions feel intentional, and the track carries momentum from start to finish.
Final Thoughts on Sidechaining in Ableton Live 12
Sidechaining in Ableton Live 12 works best when treated as a structural element rather than a corrective fix. Ghost kick routing stabilizes groove, track-level adjustments preserve rhythmic detail, and subtle bus-level compression brings everything together without flattening energy.
Choosing when to sidechain matters as much as choosing how. Leaving space for elements to breathe creates depth, while modulation offers movement without compression artifacts. Live 12 provides the routing stability needed to build these systems confidently.
When sidechain decisions support arrangement, groove, and flow, the technique stops feeling technical and starts feeling musical. That shift changes how a track develops and how it connects with the listener over time.
The post Sidechaining in Ableton 12: A Creative Guide That Goes Way Beyond The Basics appeared first on Magnetic Magazine.