


At A Glance
If you have spent any amount of time producing music inside a DAW, you have likely experienced the moment where a track looks complete on the screen but still feels strangely lifeless when you listen back and you’re left wondering how to make your music sound more human. The timing is clean, the mix is balanced, and every element sits exactly where it should, yet something about the performance feels stiff in a way that is difficult to describe.
In my experience, this disconnect rarely comes from a lack of technical skill or creative ideas. More often, it is a byproduct of digital workflows that reward precision by default, quietly nudging us toward identical timing, uniform dynamics, and static behavior unless we actively intervene. Making your music sound more human means learning how to reintroduce variation, movement, and intention without sacrificing clarity or control.
This article walks through how I approach that process in real sessions, using timing, velocity, articulation, modulation, layering, automation, and texture as performance decisions rather than corrective tools. I am writing this as if you are sitting across from me in the studio, because these are the same conversations I have with producers who want their music to feel alive instead of assembled.
Why Digital Music Often Sounds Robotic
Digital music often sounds robotic because modern production tools prioritize consistency and repeatability over variation. Grids encourage perfect alignment, MIDI encourages identical note behavior, and looping encourages repetition, which can quietly erase the subtle irregularities that signal human intent to a listener.
When every note lands at the same time, with the same velocity, articulation, and tone, the ear quickly identifies the pattern as mechanical, even if everything is technically correct. This is not a flaw in digital tools, but a natural consequence of their design, which means the responsibility for restoring feel sits squarely with the producer.
The goal is not to reject precision, but to decide where precision matters and where feel matters more. Once you start listening for interaction between parts rather than alignment to the grid, the path toward human-sounding music becomes much clearer.
Timing and Quantization – How to Add Groove Without Losing Control
Human-sounding music relies on controlled timing variation rather than strict grid alignment, allowing groove and musical pocket to emerge without destabilizing the track.
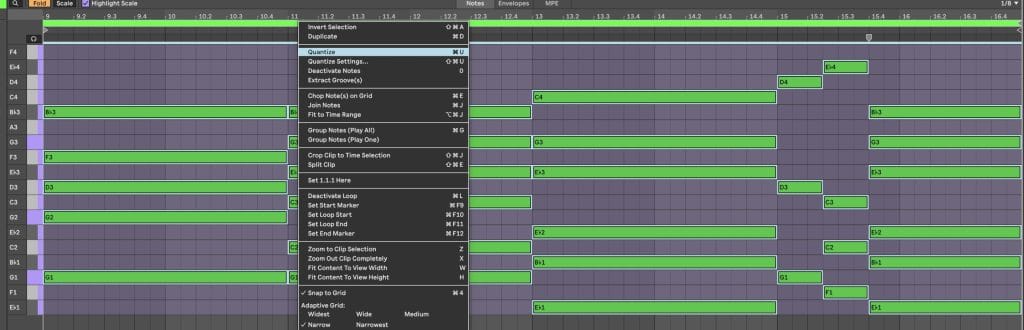
Quantization is one of the most useful tools we have, but it becomes counterproductive when it stops being a choice and starts becoming a habit. Tightening a performance can be helpful, especially for foundational elements like a kick or main downbeat, but locking every part perfectly in place often strips away the elasticity that makes a groove feel engaging.

I usually begin by deciding which elements need to function as anchors and which ones can afford to move. Once the core timing feels solid, I reduce quantization strength or manually nudge notes by ear, focusing on how the rhythm feels rather than how it looks. These micro-adjustments are often measured in milliseconds, yet they dramatically change the way parts interact with each other.
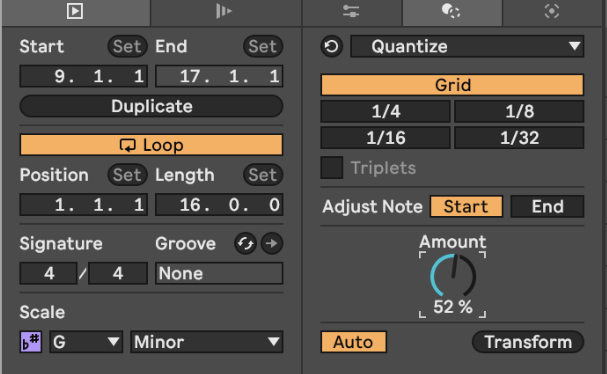
Swing works best when applied selectively. Instead of treating swing as a global setting, I think of it as a relationship between layers. Hats, shakers, or melodic rhythms can lean forward or backward while kicks and bass remain centered, creating internal tension that keeps the groove alive. The interaction between straight and swung elements often matters more than the swing amount itself.
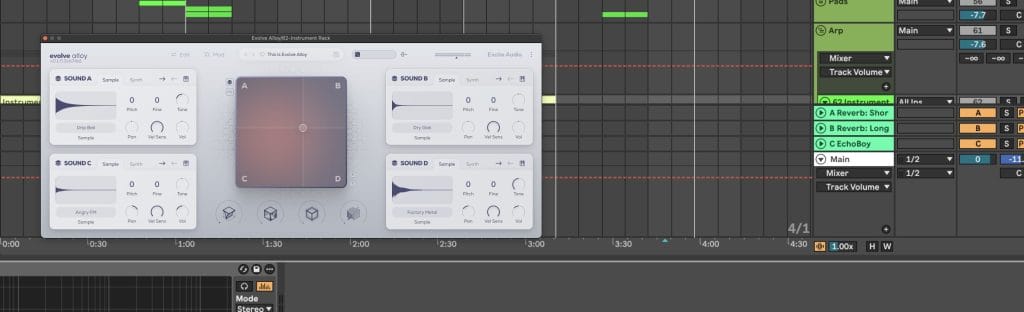
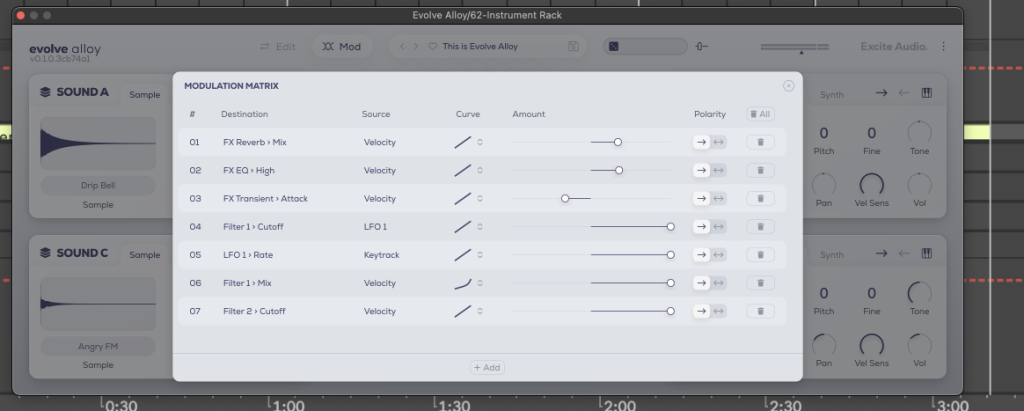
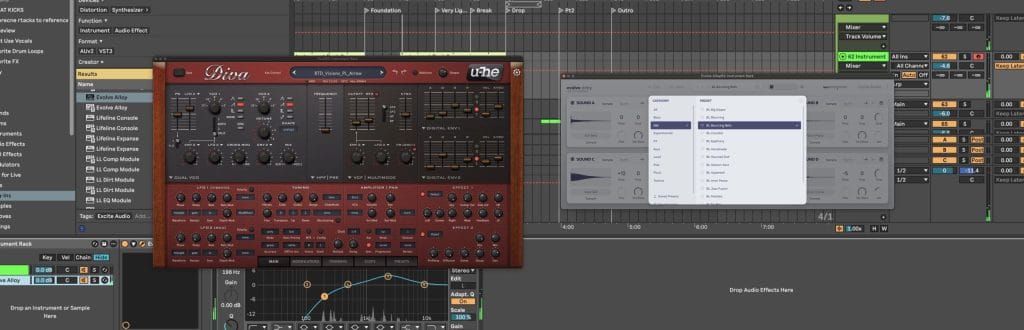
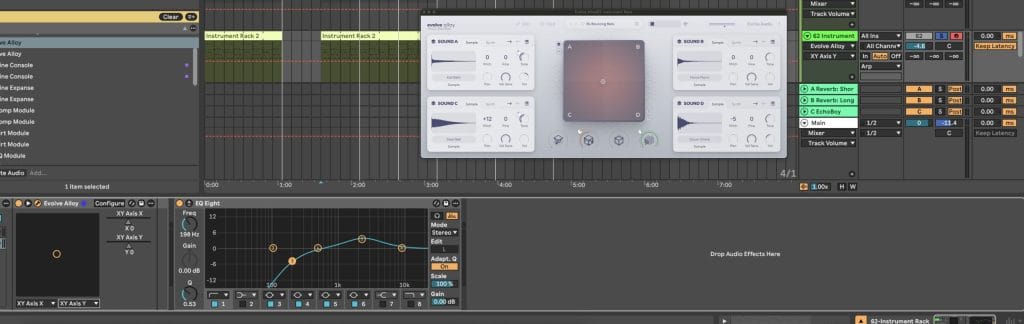
When I want to introduce movement quickly without over-editing, I will often record performance-based motion using tools like Excite Audio’s Alloy. Its XY Pad allows multiple parameters to shift together in real time, which captures subtle timing and tonal variation that would be difficult to draw manually and far more natural to listen back to.
Velocity and Dynamics – How to Make MIDI Feel Performed
Velocity variation allows MIDI parts to behave like played instruments instead of repeated triggers, giving phrases shape, emphasis, and emotional contour.
Uniform velocity is one of the clearest indicators of programmed music. When every note strikes with identical force, the ear immediately recognizes the repetition, even if the rhythm itself is strong. Human players naturally vary intensity, whether intentionally or subconsciously, and recreating that behavior is essential for believable performances.
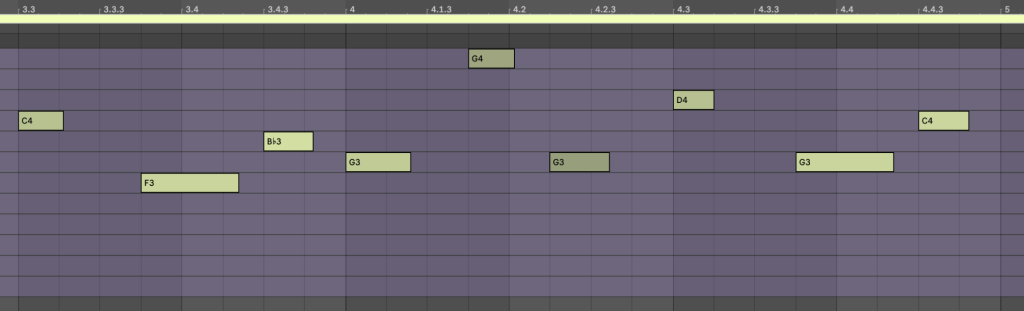
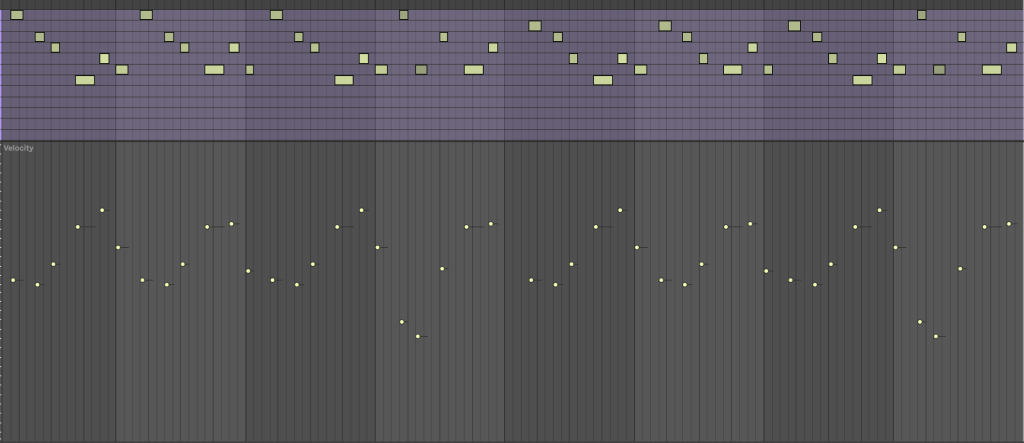
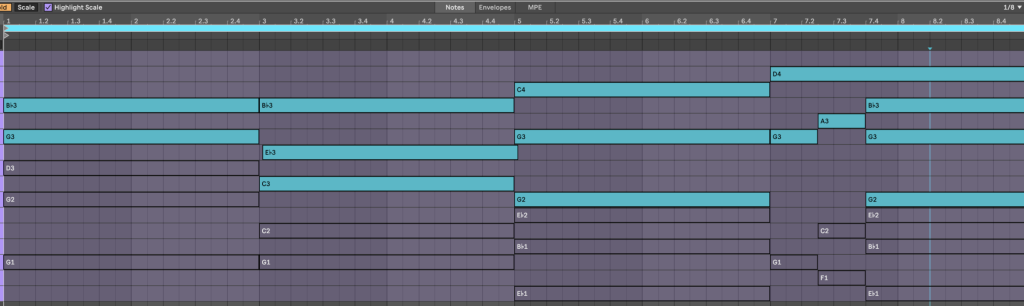
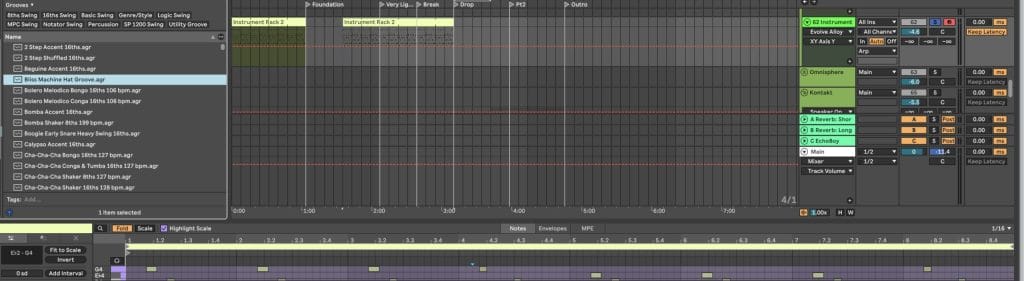
Rather than randomizing velocity indiscriminately, I approach dynamics as phrasing (like in the image that kicked off this section, where, even visually, you can see the velocity having its own cycles within the loop itself). Certain notes carry more weight, others serve as connective tissue, and that hierarchy should be reflected dynamically. Accents feel intentional when they are supported by softer surrounding notes, while ghost notes add flow without pulling focus.
Velocity becomes far more expressive when it influences tone as well as volume. Mapping velocity to filter cutoff, harmonic content, or modulation depth allows instruments to respond differently depending on how they are played, which mirrors the behavior of acoustic instruments. Softer notes become rounder and darker, while harder hits speak with more presence.
Alloy integrates naturally into this approach because its layers and modulation routing respond dynamically to velocity, allowing a single performance to carry variation without relying on multiple duplicated tracks. When an instrument reacts to touch instead of triggering the same sound repeatedly, the result feels intentional rather than procedural.
Note Length and Articulation – Letting Musical Phrases Breathe
Varying note length and articulation adds realism by mimicking how musicians naturally release and shape notes over time.
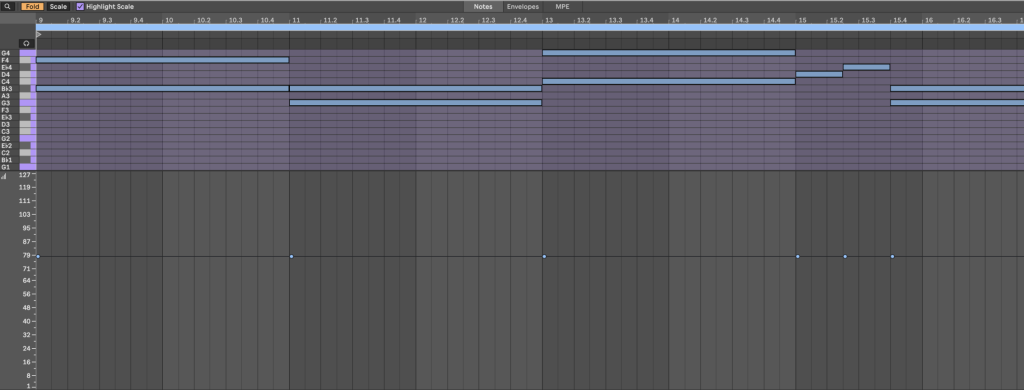
Another common cause of stiffness in digital music is uniform note length. When every note begins and ends at the exact same duration, phrases feel frozen, even when the harmonic and rhythmic ideas are strong. Real musicians constantly adjust how long notes ring out based on context, energy, and phrasing.
I pay close attention to how notes end, not just how they start. Shortening certain notes creates rhythmic clarity and space, while allowing others to overlap slightly can glue phrases together and smooth transitions. These choices often matter more than adding new notes or layers.
Envelope shaping plays a major role in articulation as well. Attack and decay settings influence how a sound feels under the fingers, whether it reads as struck, plucked, bowed, or breathed. Small changes here can dramatically alter perceived realism, especially when combined with timing and velocity variation.
With Alloy, envelope shaping and filtering are built into the sound design process, which encourages you to think about articulation early rather than trying to fix rigidity later in the mix.
Pitch, Modulation, and Expression – Subtle Movement That Feels Human
Subtle pitch movement and expressive modulation simulate the physical behavior of real instruments and prevent digital parts from feeling static.
Pitch is rarely fixed in human performance. Singers drift, string players bend, and even percussion carries slight pitch variation depending on how it is struck. Introducing controlled pitch movement adds life, as long as it remains subtle and purposeful.
I focus on micro-movement rather than dramatic gestures. Slight pitch drift, gentle bends into important notes, or vibrato that fades in toward the end of sustained tones can make parts feel alive without calling attention to the technique itself.
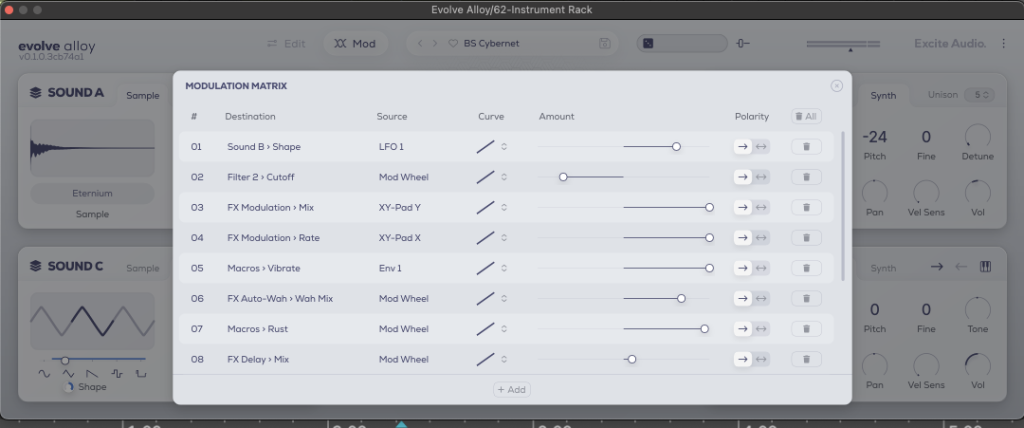
Modulation works best when it is performed rather than drawn. Recording movement captures acceleration, hesitation, and inconsistency that static automation cannot replicate. Alloy’s modulation system and XY Pad make it easy to map expressive controls to multiple parameters, allowing tone, movement, and texture to evolve together in a cohesive way.
Layering Synthetic Sounds With Human Texture
Layering becomes human when each sound behaves slightly differently in timing, dynamics, or tone, creating the impression of multiple takes rather than duplicated data.
Simply copying a sound and running identical MIDI through it increases thickness, but it rarely adds realism. Instead, I offset layers by small amounts and give each one a distinct role. One layer might sit slightly early, another might respond more strongly to velocity, while a third carries additional texture or noise.
These differences do not need to be obvious. In fact, the most convincing results often come from variations that are felt rather than heard individually. Together, they create depth and movement that would be impossible with a single static layer.
Alloy works particularly well as a texture layer in this context. Its tuned foley and metallic sources sit comfortably behind cleaner synths, adding tactile detail that enhances realism without overwhelming the core sound. Recording XY Pad movement across a phrase further reduces the sense of looping and repetition in longer arrangements.
Sound Design Imperfection – Controlled Instability That Adds Life
Subtle detune, noise, and modulation introduce organic instability without sacrificing clarity, helping digital sounds feel physical rather than sterile.
Perfect stability never holds up over long stretches unless you’re making something incredibly commercial sounding. Controlled imperfection adds motion and interest while preserving musical intent. Noise can act like air around a sound, especially when it evolves slowly over time, while micro-detuning adds width and movement without resorting to heavy chorus effects.
Alloy includes noise, detune, and pitch drift directly within the instrument, making it easier to build these characteristics into the sound itself instead of layering corrective effects later. Its macros are especially useful for performing character changes quickly, allowing tonal evolution that mirrors how musicians adjust touch or intensity during a performance.
Automation as Performance, Not Cleanup
Recorded automation captures natural motion and phrasing that static automation cannot replicate, making it one of the most effective tools for humanization.
Rather than drawing automation as a corrective step, I treat it as an extension of performance. Recording automation passes captures nuance that is difficult to recreate manually, especially when it comes to timing and dynamic changes that happen instinctively.
I typically work in layers, starting with broad section-level moves and refining details once the overall arc feels right. This keeps arrangements evolving without overwhelming the mix or the listener.
Alloy’s XY Pad and macro controls support this approach by allowing expressive movement to be captured quickly and clearly, both sonically and visually, which also makes documentation and recall easier later on.
Final Thoughts – Human Feel Comes From Intentional Decisions
Human-sounding music balances precision with variation, allowing expression to emerge without losing structure. The most compelling productions live in that balance, where clarity supports feel rather than replacing it.
When you approach your DAW like an instrument instead of a grid-based editor, and when you use tools like Excite Audio’s Alloy to capture motion, texture, and performance instead of flattening them out, your music starts communicating on a deeper level. That sense of connection is what listeners respond to, even when they cannot explain why, and it is what keeps music feeling alive long after the technical details fade into the background.
Frequently Asked Questions About Making Music Sound More Human
What does it mean to humanize music?
To humanize music means intentionally adding variation, expression, and imperfection so a track feels performed rather than assembled.
This often includes subtle changes in timing, velocity, pitch, articulation, and modulation that mirror how real musicians naturally play. Humanization is not about making music sloppy or unpolished, but about allowing movement and phrasing to exist within a controlled structure. When done well, the listener may not consciously notice these changes, but they feel the difference emotionally.
Over time, humanization becomes less about tools and more about listening for feel instead of visual precision.
How do you humanize AI-generated music?
Humanizing AI-generated music starts with breaking its reliance on uniform patterns and perfect repetition.
AI often produces rhythmically and dynamically consistent material, so introducing timing offsets, velocity variation, and phrasing changes immediately helps restore musical intent. Performing automation, reshaping note lengths, and adding expressive modulation can transform static AI output into something that feels directed by a human hand. Layering AI-generated parts with human-played or performance-based elements also helps ground the material emotionally.
Another thing to try would be to use tools like Ableton’s new stem-splitting tech that recently launched in its newest update and break the AI-output into its parts and apply varying groove and swing templates to a few choice stems. Some layers would remain robotic and rhythmically sterile, but having just a touch of human swing might be all it takes to give the impression it’s all more human-like.
The goal is not to hide that AI was used, but to reclaim authorship through deliberate musical decisions.
How do you produce a more human sound in electronic music?
Producing a more human sound in electronic music requires shifting focus from visual alignment to listening-based decisions.
Timing, dynamics, and tone should be shaped by feel rather than grid accuracy, even when the music remains tightly structured. Velocity variation, micro-timing adjustments, and expressive modulation are often more impactful than changing sounds or buying one of the best plugins that dropped this year. Layering textures that respond dynamically, rather than repeating identical loops, adds depth and realism. This approach trains you to think like a performer, even when working entirely inside a DAW.
Why does my music sound robotic even when everything is on time?
Music can sound robotic when everything is perfectly on time because real performances rarely behave that way. Identical timing, uniform velocity, and static modulation remove the subtle irregularities that signal human intention to the listener. Even small variations in timing and dynamics can dramatically change how a groove feels without making it messy.
The issue usually is not correctness, but sameness. Human feel emerges when parts interact with each other rather than locking into identical behavior.
How can I make my voice or sound resemble someone else’s style?
Making your voice or sound resemble another artist’s style comes from studying phrasing, dynamics, and expression rather than copying surface-level traits. In music production, this often means analyzing how an artist uses timing, articulation, and tonal movement instead of simply matching sounds.
Subtle performance choices, such as how notes are attacked or released, carry more stylistic identity than presets or effects chains (even if you make them your own). Experimenting with these elements helps you internalize stylistic characteristics while still maintaining your own voice. The most convincing results come from understanding how something is played, not just what it sounds like.
What is the most important factor in making music sound human?
The most important factor in making music sound human is intentional variation guided by listening rather than visual feedback. Timing, dynamics, and tone must change in ways that support musical phrasing instead of remaining static.
Tools and techniques matter, but they only work when applied with a performance mindset. Human-sounding music emerges when you treat your DAW as an instrument instead of a grid-based editor. This mindset naturally influences every production decision you make.
The post How to Make Your Music Sound More Human: Everything I’ve Learned After 13 Years As A Producer appeared first on Magnetic Magazine.