


To be honest, I feel like Rezz and Virtual Riot are two names that need no introduction at this point. Having followed their respective careers for about as long as I’ve been a producer and been involved in the industry, I’ve seen them both from being forward-thinking up-and-comers to their current GOATED status. And when their latest track which they made in collaboreation with each other and which was recently released on none other than Monstercat itself, I had to see if we could get a peak behind the curtain and see how they both made their tunes.
Because “Give in to you” is the textbook definition of a track that is greater than the sum of its parts, with each producer and vocalist bringing something incredibly unqiue and one-of-a-kind to the record. So listen to the track a few times below to acclimate your ears to the sauce they’re about to be sharing before diving into the latest iteration of How It Was Made: Rezz & Virtual Riot – Give in to you (feat. One True God)
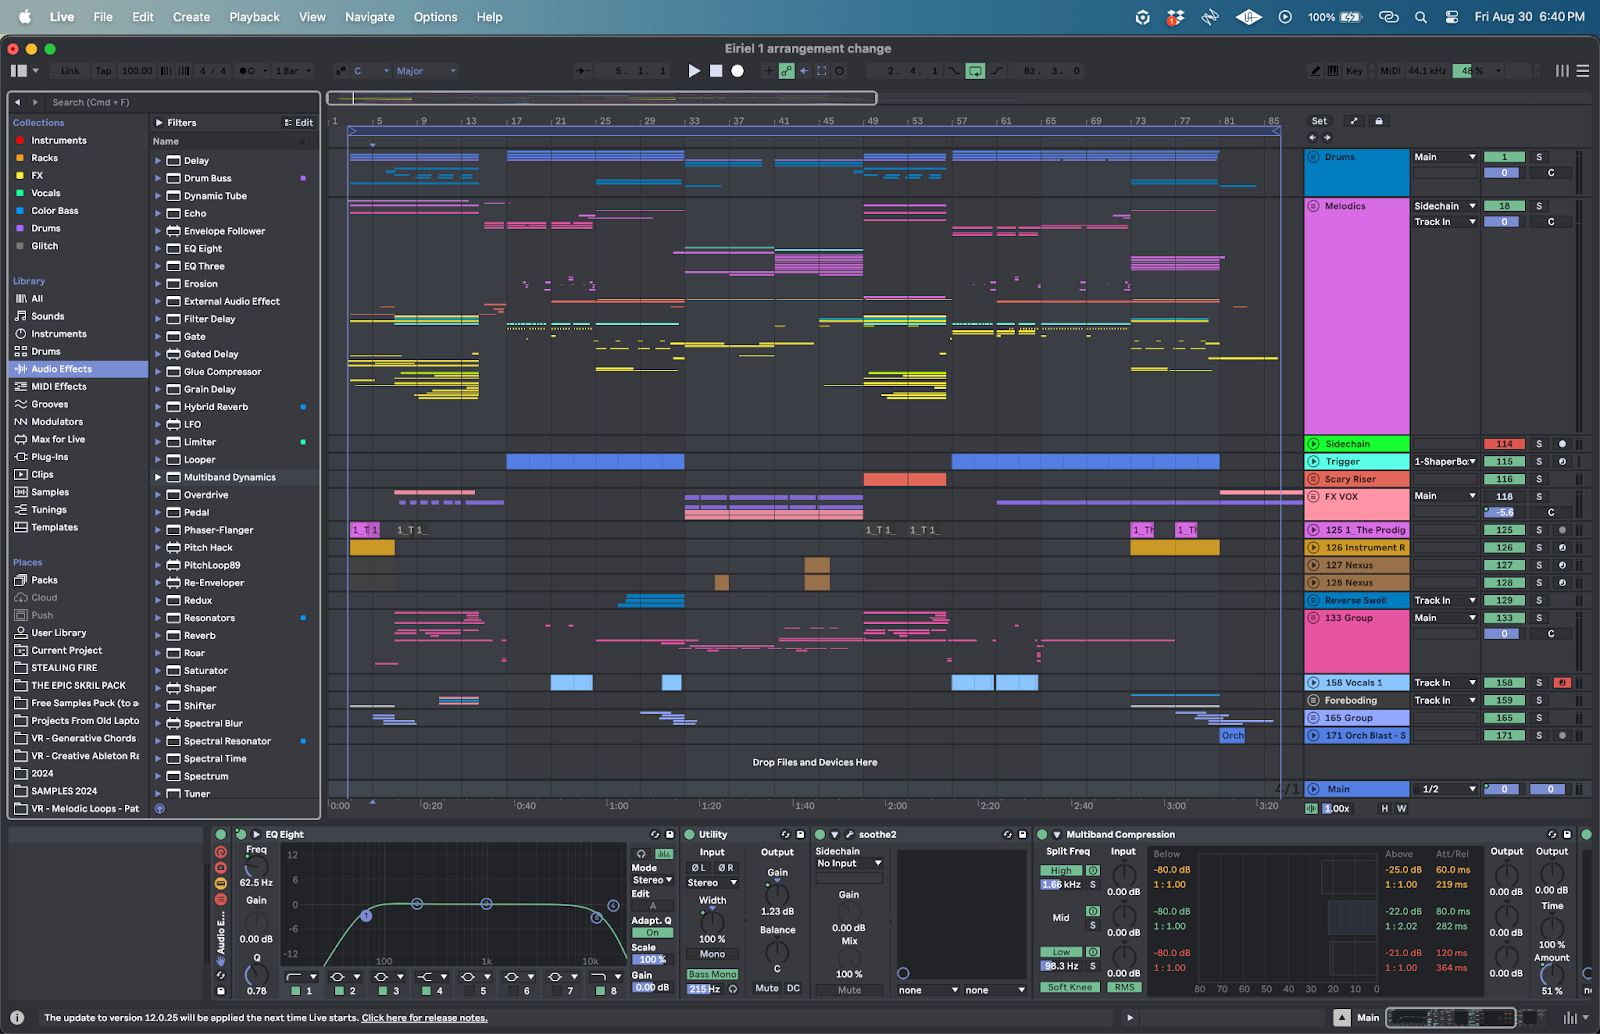
I know it says “Eiriel 1 arrangement change” at the top but this is indeed the project file for “Give in to you.” The working title of the instrumental was Eiriel before the vocals were added.
Phase Plant
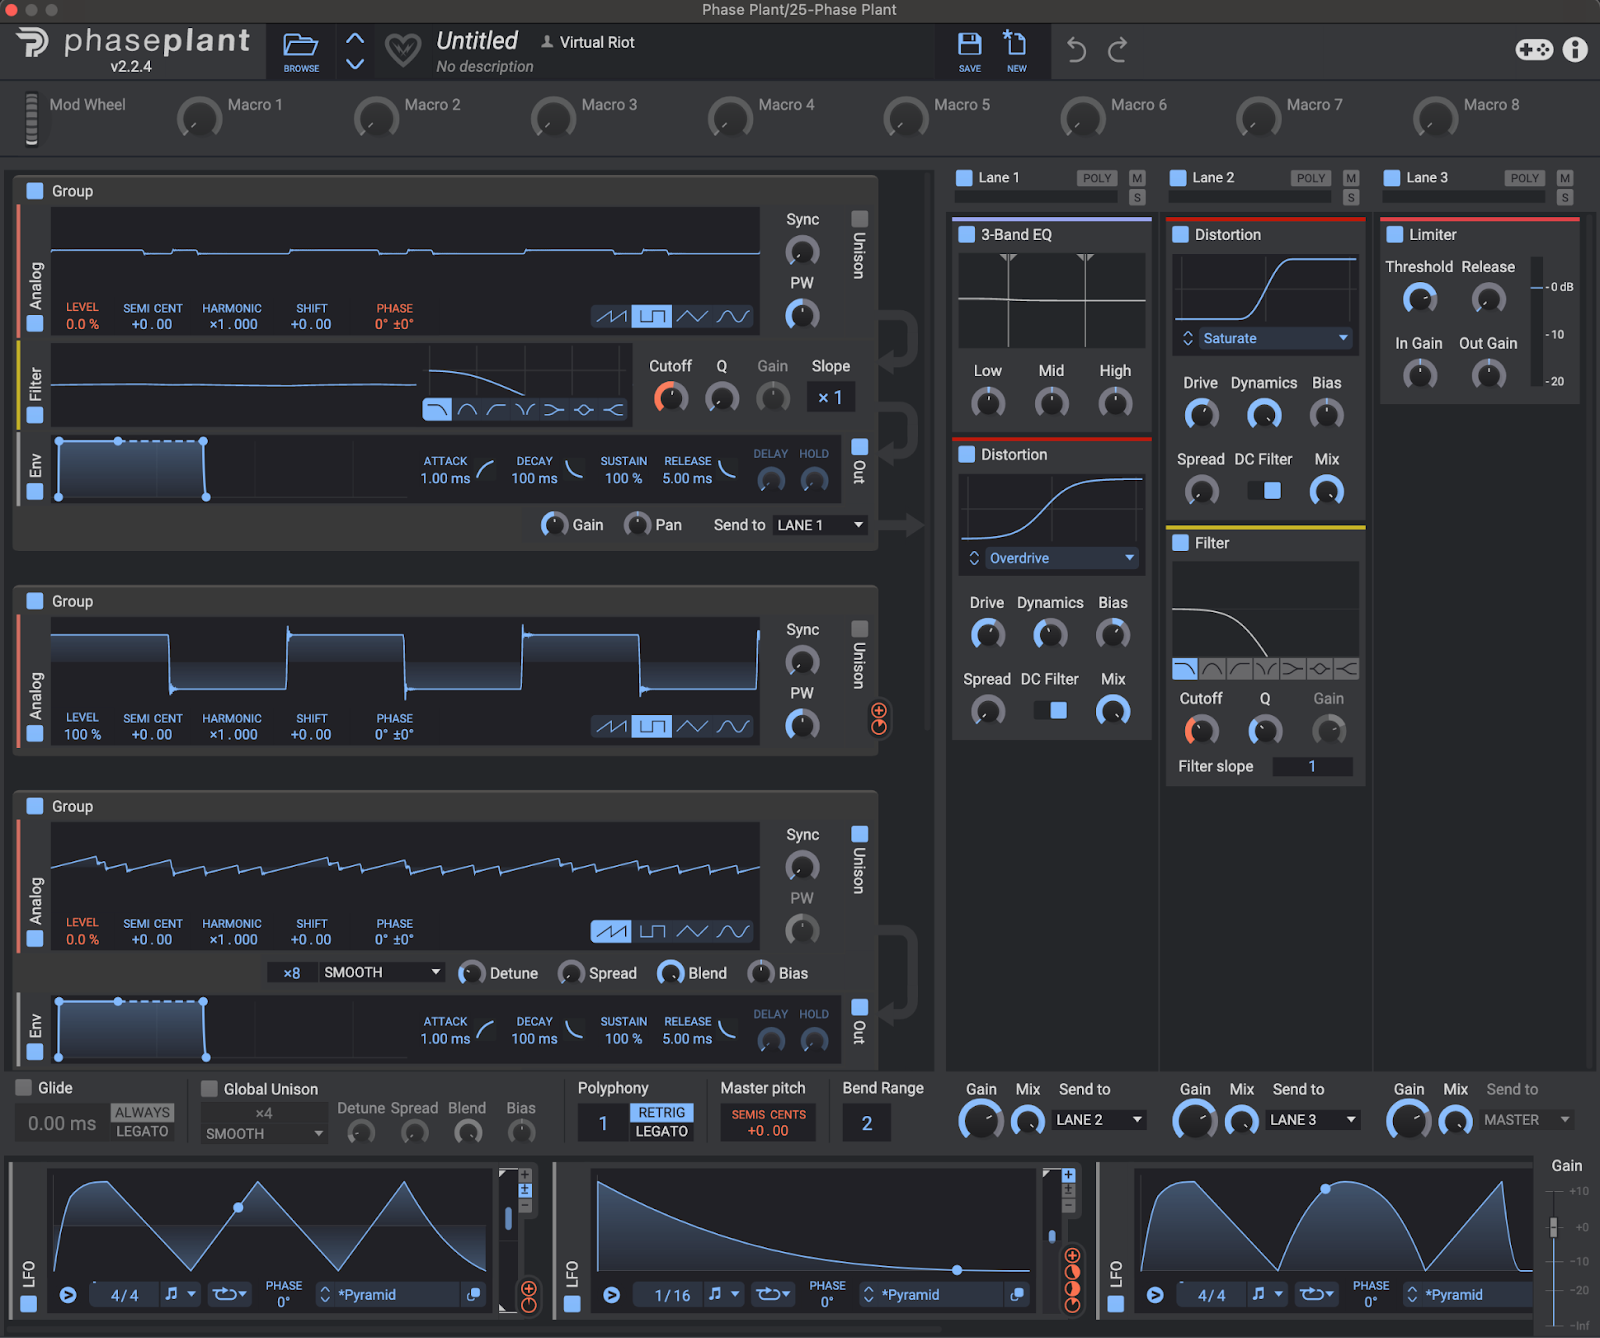
The main synth used on this track is Phase Plant by Kilohearts. It’s kind of an everything-synth that lets you build sounds in a modular way by giving you as many oscillators, modulators and effects as you wish, you just have to wire everything up yourself, kind of like a hardware modular system.
When you first open it up you’re greeted with a blank canvas that you have to populate with modules yourself. It definitely takes more work to get to the sound that you want but it also gives you the maximum amount of freedom to try out almost any crazy sound-design idea.
The pitch-drift of the main bass happens inside the synth through a custom shaped LFO, I often prefer this over modulating the pitch-bend manually. Most of the sound sources used are just standart saw-wave Oscillators but run through low-pass filters modulated with plucky LFO shapes. After that, the whole sound runs through different distortions and compressors. The entire track containing the finished sound and the MIDI clip to play the notes was then duplicated multiple times and those duplicates were then adjusted to fill out different parts of the frequency spectrum. One layer for example runs through Native Instruments Guitar Rig and gets super distorted like a heavy metal guitar, while another stays rather clean and contains the sub for the whole stack. The third one might be clean but detuned to fill in the frequencies that the Guitar Rig layer doesn’t cover like the very top-end and some low-mids that just became way too boomy on the other layer.
The basic groove and vibe of the mid-tempo genre is achieved somewhat easily. All you need is a kick and a punchy low snare or clap-snare between 100 and 110 BPM together with a fat and plucky bass synth that runs at 16th, 8th triplets or 8th notes. You don’t need any fancy plugins to get to this point but this basic layout definitely needs something special that sets it apart from the barrage of similar sounding cyberpunk-esque stuff xthat’s out there, otherwise the track won’t stick out at all.
Playing around with bass sound and trying out some crazy sound design things on it that are a bit out-of-pocket for this genre is one thing you should do. Unique distortion plugins like Guitar Rig (we’ll talk about that one more a bit later) or crazier sound-design tools like spectral FX (Unfiltered Audio’s SpecOps) can work wonders to quickly turn a basic patch into a refreshingly unique and prominent sound. Another – and in my opinion more important – thing is to think of a concept for the entire song. It can be something storytelling related, maybe a vocal and its lyrics put you into a certain mood that then just guides your production decisions as you write the song. Maybe there is a catchy melody involved or the rhythm of the bassline is just so different and unique that it can carry the song alone. It can also be a feeling, like it was for this track. The underlying emotion for the entire instrumental, even before we had the vocal, was the feeling of being drawn towards something that you know isn’t good for you but it draws you in because it’s familiar to you and this familiarity can be comforting, even if you know it’s bad for you. This then reflected in the bassline receiving a kind of ‘threatening’ sounding pitch-modulation, inspired by the dark and sustained bass in Childish Gambino’s “This Is America”. The melodic mid-section then kind of went to represent the comfort in the familiarity of whatever evil thing is drawing you in.
Guitar Rig
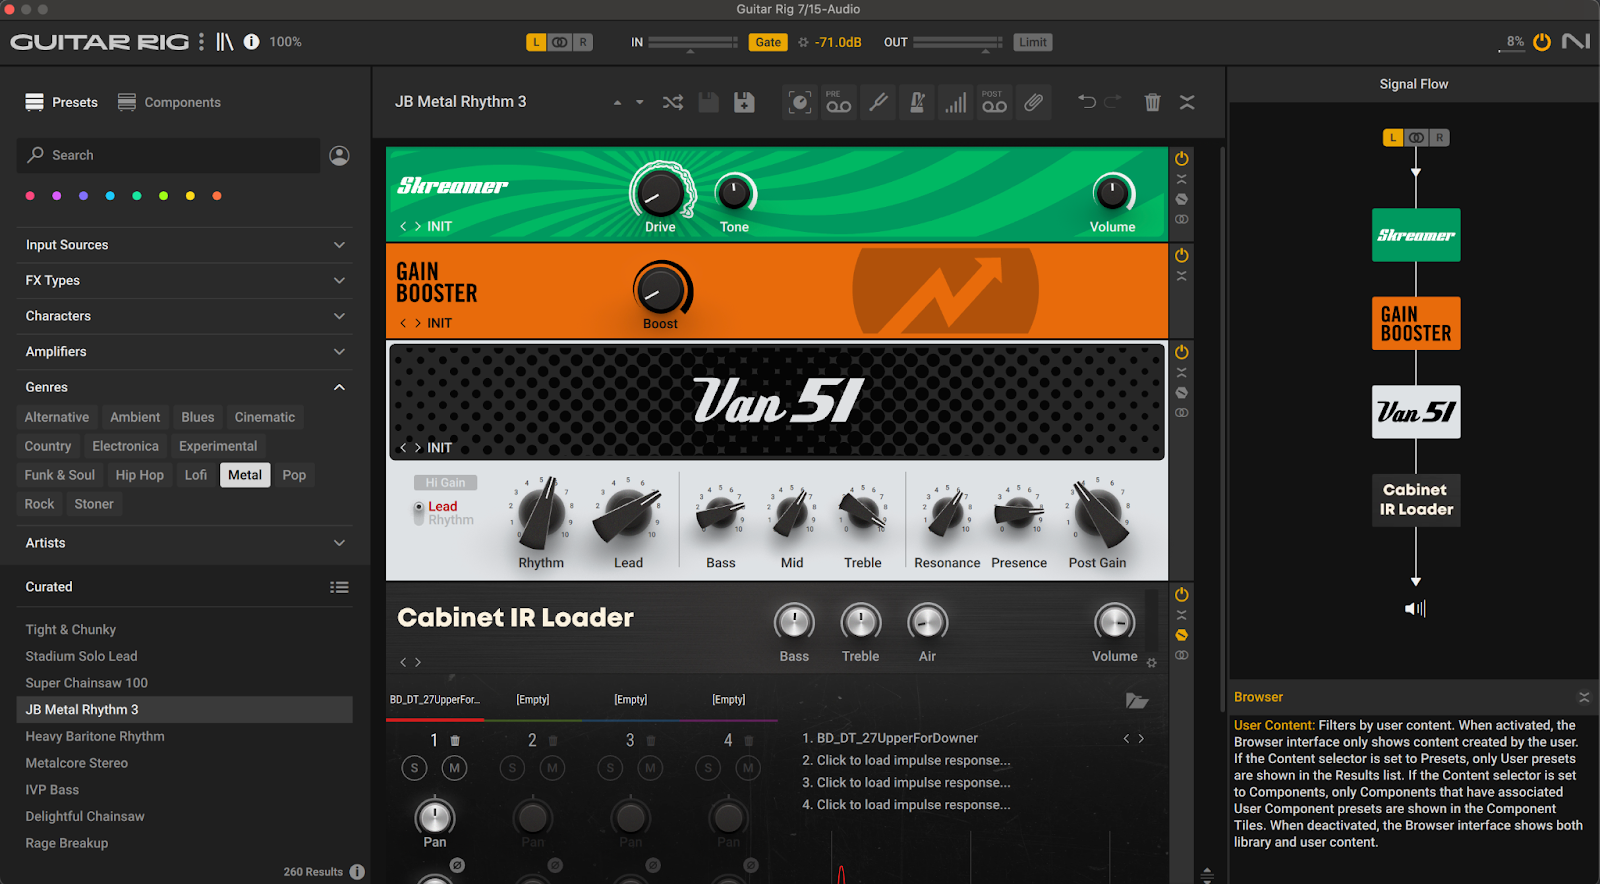
If you haven’t seen or used Native Instrument’s Guitar Rig before, it’s basically a guitar amplifier and cabinet simulation that lets you turn a clean recorded guitar into whatever guitar sound you like, from funk and jazz through country and alternative to rock and metal. It also has a ton of effects in it like guitar effect pedals and some freaky stuff like grain delays, pitch shifters and weird phasers and flangers. It’s main use case is obviously for guitars but you can run anything you like through it.
One of the bass layers, definitely the loudest and most prominent one, is a bass sound made in Phase Plant run through Guitar Rig. The settings are somewhere on the Rock/Metal side and we’ve tried out a few guitar cabinet impulse responses until we found the right sound for the track. Since a clean guitar is rather soft in it’s sound compared to a synthesized bass, a lot of the top-end needs to be controlled afterwards to not make the now amped synth hurt your ears, so this layer in the bass group is actually rolled off pretty early somewhere around 2-3khz. The rest of the top-end is then filled up by a clean duplicate of that Phase Plant patch.
Putting Guitar Rig on synths is definitely not always the way to achieve a cool sound. If the processing in Guitar Rig is heavy and including a lot of distortion then the input signal should be dry and clean or you’ll end up with a huge mess of noise if the input sound has any reverb or delay on it (unless that’s what you’re going for). Sometimes a clean amp with a cabinet is enough to give a synth patch a more organic and analog feeling sound. An important thing to watch out for is the fact that most presets and setups in Guitar Rig will be set to receive a mono-input by default, since a recorded guitar is usually just a mono signal as well. You’ll have to adjust the input setting as well as the mono/stereo setting on devices like the amp and the cabinet so that the plugin accepts the input as stereo and processes it like that as well. If your input is actually mono, you can actually do some fun split-processing inside of Guitar Rig where you run the sound through two parallel chains each with different amplifiers and cabinets and then pan those chains left and right for a stereo sound.
MPE
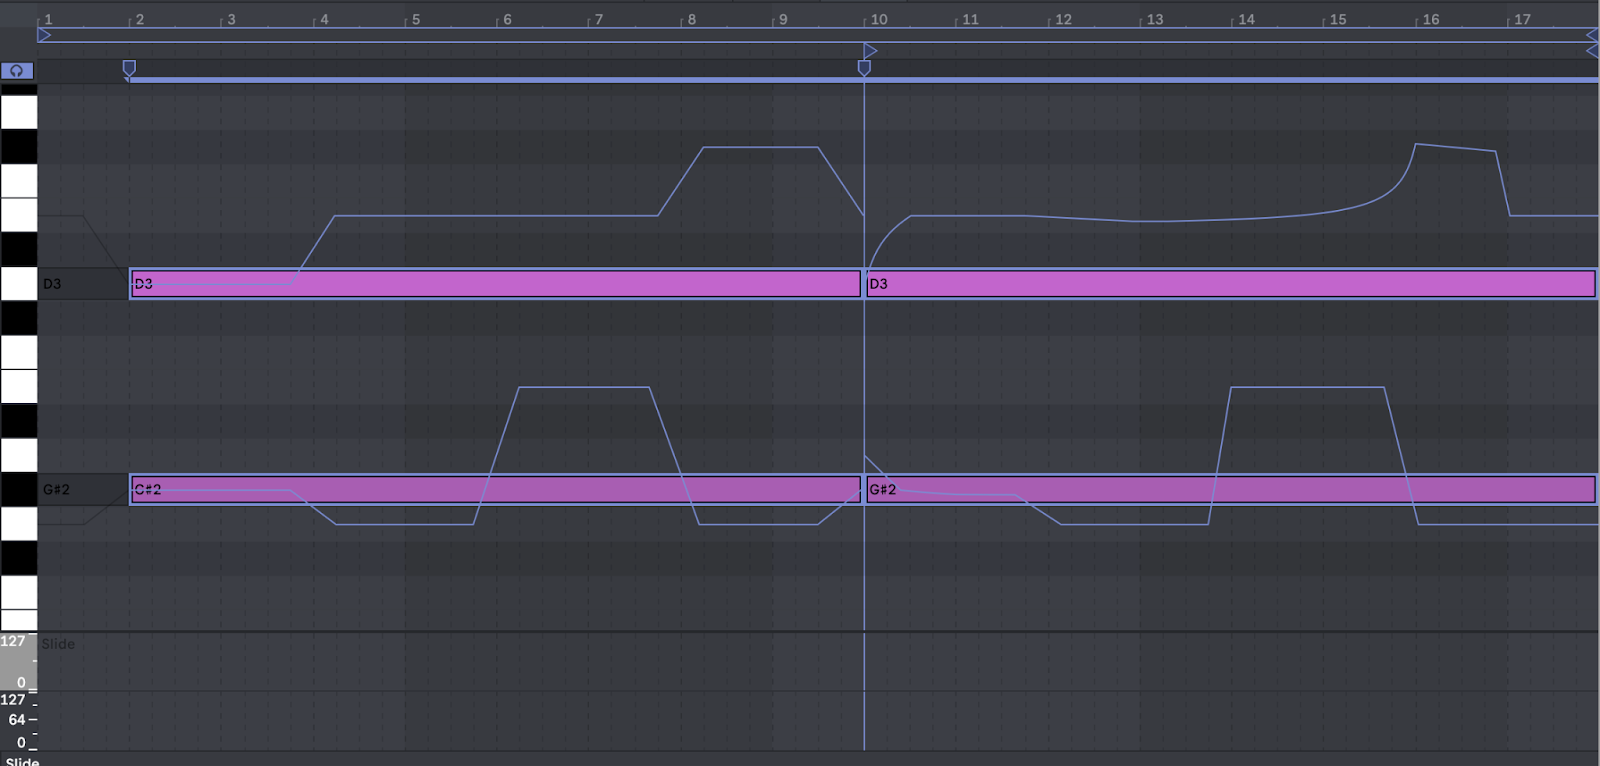
MPE isn’t so much a plugin as it is a way of modulating different parameters individually for each midi-note. It’s heavily used in movie-scoring to make string arrangements especially dynamic and realistic. You could hold a chord with 3 notes and have one of them increase in volume while another decreases at the same time. This also applies for pitch-bending so you could for example go from one chord to the next by just bending each note up or down, allowing for some really smooth and organic sounding transitions between chords.
In “Give in to you”, the midsection features some dramatic chords played by synths and strings. We’ve used the per-note pitch bend feature of MPE here to slowly bend from one chord into another, sometimes having a higher note of the chord bend slowly while the rest changes quickly to the next chord to create some detuned friction and dissonance that eventually resolves once all the notes have arrived at their new pitch. As far as I know this feature is available in most DAWs like Ableton, Cubase and FL. It can be a chore to set up and it gets very finicky to dial in the perfect amount of glide between the notes but it was definitely worth the effort doing it on this song.
If you want to try using MPE in your productions, make sure the plugin you’re using supports this feature. You might be required to go into the settings of whatever plugin you’re using and turn on MPE as some plugins don’t have it on by default. Once you’ve created a MIDI clip full of bending notes that you’re happy with, try duplicating the clip and putting it on a different plugin, it can be a great way to layer two sounds together as they will now both follow the MPE pitch-bends. In “Give in to you”, we first programmed the chords for the strings (using a Kontakt 6 library for the string sound) and then copied the MIDI to a synth plugin (serum) to layer the strings with some saws, resulting in a lush mix of real instruments and synthesized chords.
Sugar Byte’s Effectrix
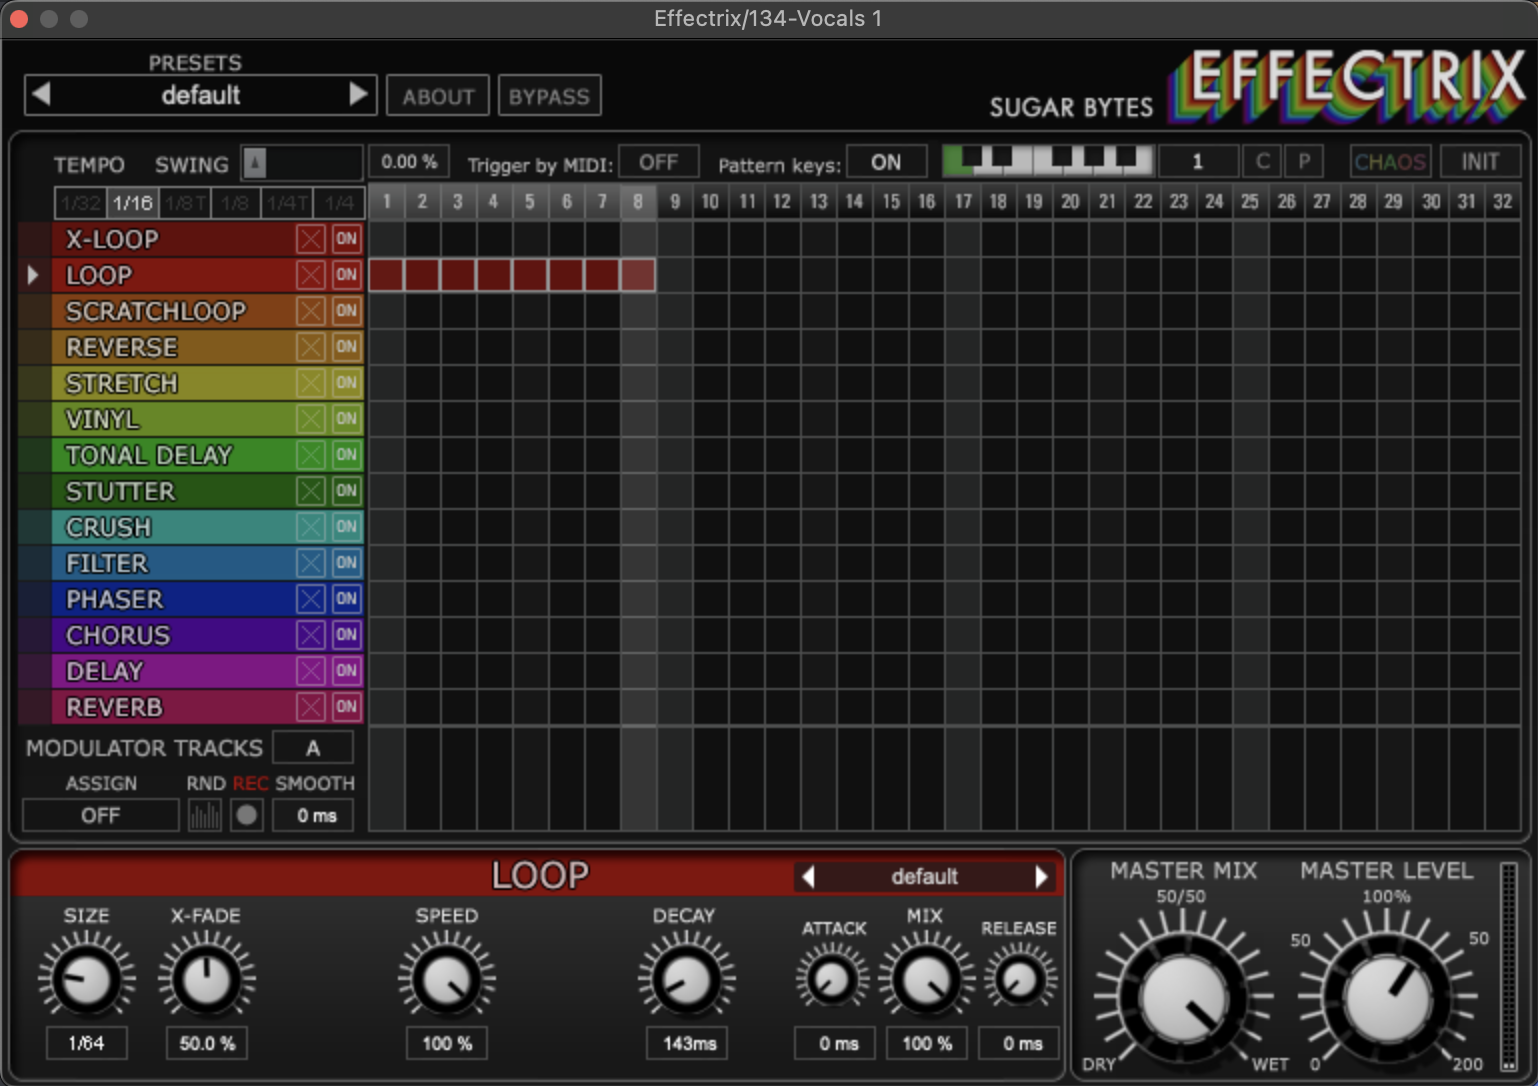
Sugar Byte’s Effectrix is one of those old classic plugins that’s still getting a lot of use in today’s productions. It contains 14 different effects that you can turn on or off with a grid-based sequencer, allowing for some glitchy chaos to spice up a flat sounding loop. Some of it’s effects are often used just by themselves like “Vinyl” to create a tape-stop effect when needed or the “Tonal Delay” for comb-filter like riddim-yoinks.
My favourite way to use Effectrix is to enhance vocals with some glitchy artifacts. In the case of Alan’s (One True God) vocals on this song, I’ve used the Loop effect and put the grid on 1/16 speed. The loop effect creates a fast almost tonal robotic loop of his voice at 1/64 speed, but this loop gets re-triggered every 16th note because of the individual blocks in Effectrix’ sequencer. The other important part is to turn down the “Decay” knob inside the Loop effects parameters. That way you end up with a plucky rhythm at 1/16th note speed that sounds like a robotic layer on top of the original vocal. In the final track this is added on top of the original lead vocal and blended in and out to accentuate certain parts of it.
Honestly the best way to use Effectrix is often to hit the “CHAOS” button in the upper right corner and just see what happens. Sometimes I’ll end up putting it on an entire group of tracks or even on the master just to turn it on or blend it in with the “Master Mix” knob for a short moment to create an interesting fill at the end of a phrase or a section of a song. You can also adjust the length of the sequencer that triggers the different effects and even set it to odd numbers like 3, 5 or 7 to create some moving-accent poly-meter style patterns which is great for techno or progressive genres where you might have a loop that plays for a long time but constantly changes in a subtle way.
Quick Fire Tips For Making Music
Tip #1: Go into it with a theme in mind! A good concept works in almost any genre and can guide your way when you get stuck.
Tip #2: Don’t try to do what everyone else is doing. Be aware of the genre’s foundations but don’t be afraid to make some radical changes to it!
Tip #3: Mixing first, loudness later. This genre relies on dynamics and contrast. Streaming services are normalizing track loudness anyway so prioritize the sound of the mix over its loudness.
Tip #4: Make the drums stomp. A high pitched tonal snare won’t work as well as a simple clap on the 2 and 4, together with the kick of course.
Tip #5: Go sample-hunting in the movie-scoring section. Cinematic samples meant for scary movies can go a long way to create atmosphere for these kinds of songs.
The post How It Was Made: Rezz & Virtual Riot – Give in to you (feat. One True God) appeared first on Magnetic Magazine.