


Ceri’s new single landed with the same confident touch that defined her long sets at Corsica Studios.
The track came together through a mix of hardware, thoughtful sampling, and the kind of in-the-box shaping she teaches in her Find Your Own Sound community. It carries the character of her DJ sets, pulled from long hours spent refining small details until everything sits with purpose.
The project grew from a simple idea built around the Jomox XBase 09, a few carefully chosen samples, and a workflow that focused on clear movement in the arrangement. Instead of stacking layers for the sake of density, she leaned into texture, space, and steady momentum, letting each element earn its place. That approach shaped the backbone of the track and kept the production rooted in intention.
This feature breaks down the exact tools she used, the techniques behind them, and how those choices shaped the final record.
Jomox XBase 09 Drum Machine
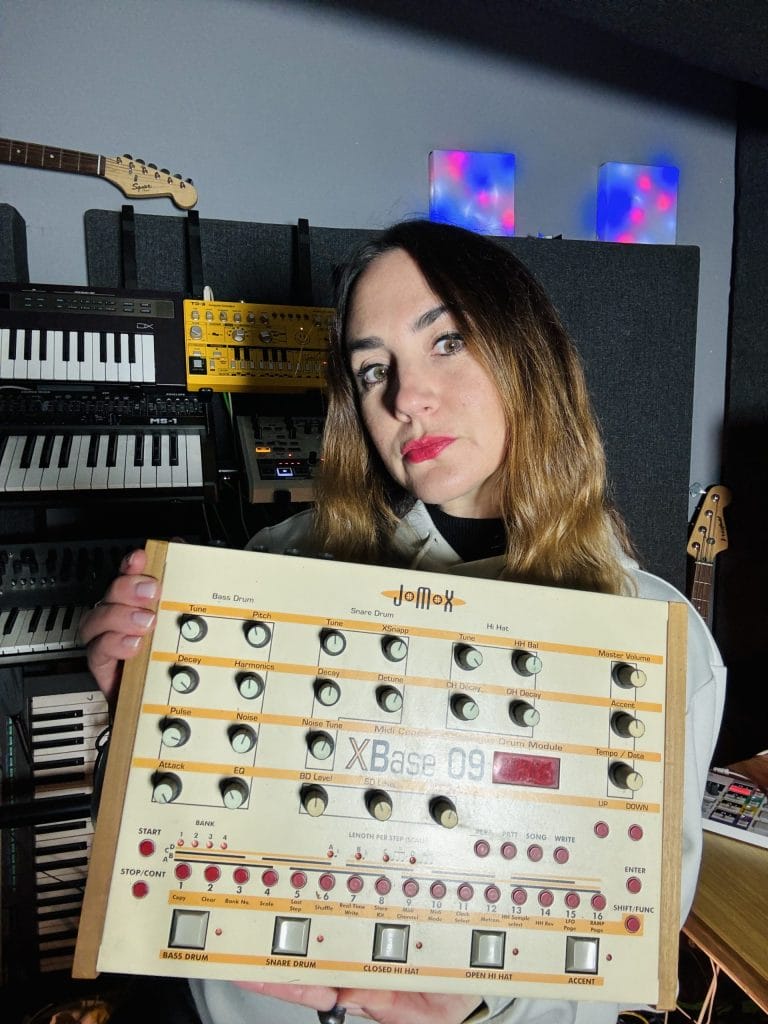
I thought this track would be a good example to show you guys because it is quite a simply made track, very sample based, and apart from the Jomox percussion sounds, was using sounds made either entirely in the box, or sampled.
The Jomox Xbase 09 is a hybrid analogue/digital Drum Machine that I love and have been using for many years. When I bought mine it was because I read it was similar to the Roland TR808 and TR909 but cheaper in price. I personally found that it’s different enough to stand out and create groovy and phat rhythms that are more unique to me.
For this track, I used a few different hi-hat and ride sounds from this machine, layered with some other percussive elements including a very famous drum sample (that I will discuss later). I made my own sample pack using this drum machine, so I have access to sounds I have made and recorded, even when I am travelling. I spent a few days recording different jams of various percussion loops, and then like to use them in different ways in different tracks.
The machine can produce quite a phat sound, and as with a lot of analogue equipment it can also sometimes have a hum / noise on the recordings too. I quite like this because it makes the sounds warm and phat and raw, but often this means I have to EQ them and subtract some frequencies to ensure they don’t overpower other elements in the track, and also that any ‘noise’ is subtle and not too much. During the arrangement process I often automate these parts in / out using EQ or Volume automation to give the feel of being mixed live on a mixing desk.
I thought this was a good thing to share because many producers don’t have access to studios, so even if you don’t have a drum machine, you can still find great sample packs that have big phat sounds you can use and create an analogue sound in the box. For example, the snare in this track is a sample which I split into two channels, left and right, to create more interest. And it can be nice to cut them up into one hits and play them in. Or cut them up and change the rhythms slightly every few bars too, to add more variation than a straight up sampled repetitive loop which can sounds boring and ‘blocky’.
Amen Break Drum Sample
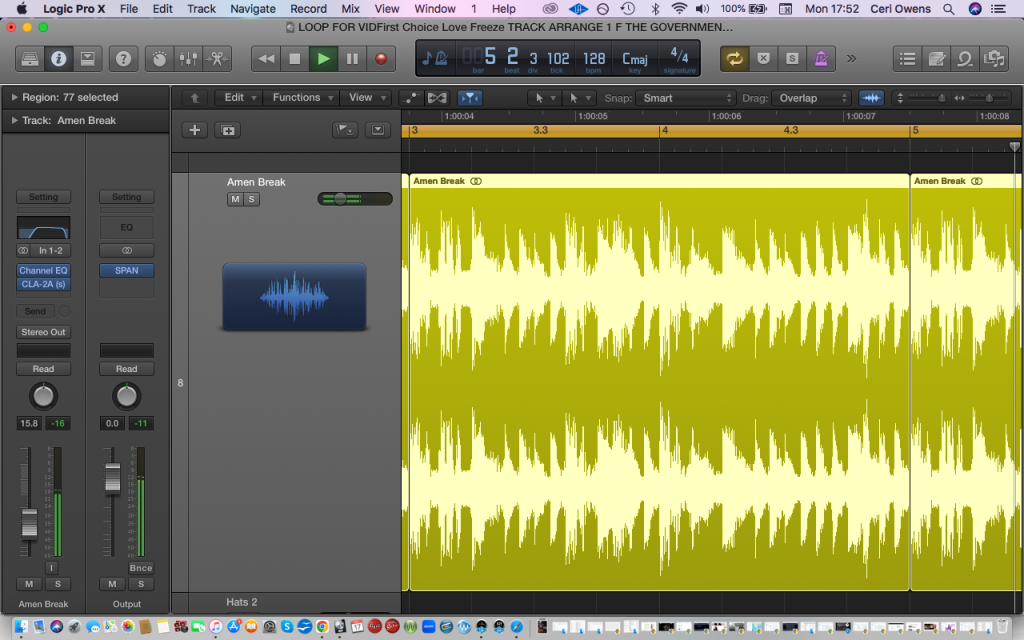
The Amen Break sample is probably one of the most sampled drum breaks of all time, credited for being a foundational element of drum and bass and jungle. If the Amen Break didn’t exist would we even have dance music as we now know it?
Usually, I try to stay away from really ‘obvious’ samples, or things that have been used a lot. However, this track I actually made by mistake! I was using this sample to teach some producers about sampling as part of my Find Your Own Sound Masterclass. I picked this sample for obvious reasons, so I was initially just using it as an example, alongside some acapella vocals, to show them different ways of sampling. When I started jamming with this drum loop, the vocals, a few other percussion elements and played in a New York sounding bass, it really gelled together nicely. Probably because I wasn’t even intending on making a track from it, so it flowed effortlessly as there was no pressure to create. I really liked it, so I decided to finish it and release it, using the vocal samples to create synth like hook patterns and melodies by sampling them in different ways.
Interestingly, this Amen Break sample was from a royalty free sample pack, but when I first uploaded the demo to soundcloud, another producer had also used it, and copyrighted their track, so my track was flagged as being a copy of his track, which it wasn’t, we had just both used the same sample!
This is why I advise people, (and usually also do it myself) to change any samples / loops used in some way, to make it your own. Not just because it makes it more unique to you, and more interesting (variation within elements is key), but also to avoid things like this. In this instance, luckily I uploaded the demo before it was released, so when I saw the notification, I edited the sample so that it would not be flagged and taken down in future. Cutting it up and moving it around, or changing the pitch can work well for this.
Waves CLA-2A
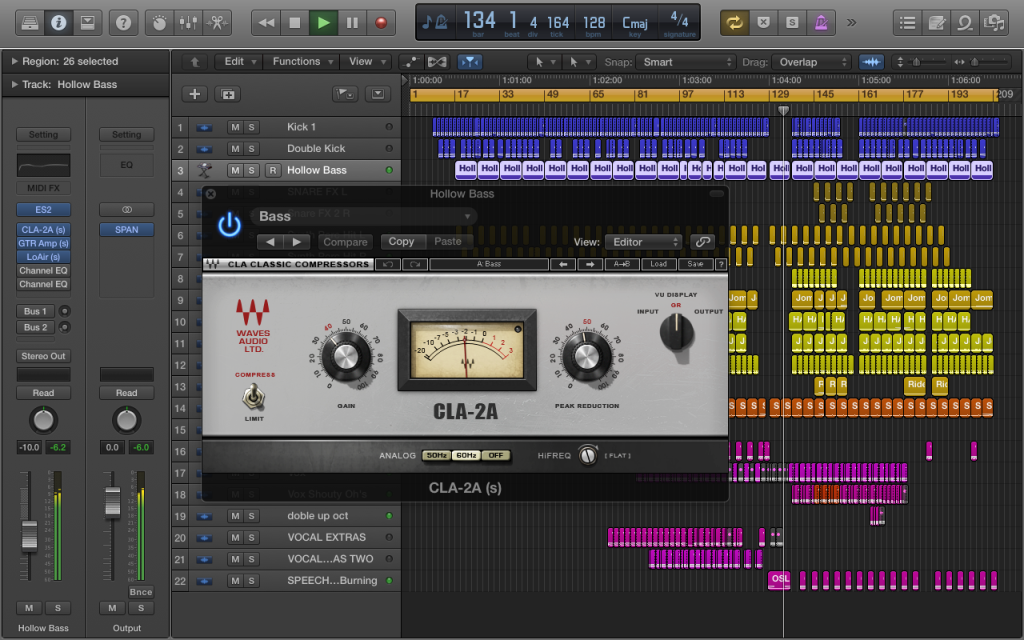
The Waves CLA-2A is probably my favourite plug-in. It is modelled after the legendary electro-optical tube compressor: Teletronix LA-2A. It gives any sound depth that makes even digital sounds sound analogue. It adds clarity, character, brightness and warmth and I absolutely love it. Of course we want to use phat sounds in the first place though, and not rely on plug-ins to improve weak sounds (ideally don’tt use weak sounds in the first place!), but this can really help to beef up sounds when needed.
In this track, I used this compressor on the bass. Because I was demonstrating to the students, I wanted to mostly use sounds and effects that were easily available to them. So I used a Logic stock bass for the bass. It was a New York-sounding ‘Hollow Bass’, and despite being a lovely sound, it was quite weak, especially in comparison to the other sounds in the track. So I used the CLA-2A to help give it extra warmth, depth and brightness, as well as adding an Amp, and a subharmonic synthesiser effect, to enhance the low end.
I love to use it on any sound that I want to add warmth/depth / clarity too. It works really well on percussion, vocals and bass! Although, I recommend using it on the individual tracks rather than on a group, so they sit in their own energy nicely. You can always add a different compressor / EQ / reverb on a group to gel it together also. We want that balance between each sound cutting through the mix individually, as well as making the music feel it’s coming from the same place, as one group too.
Parallel EQ Technique
So I’m sure most producers have heard of Parallel Compression, but have you heard of Parallel EQ?
Parallel EQ is a way of using sends and EQ to create more depth, movement, space and width in your music. And unlike the previous example, this is best done on groups. I particularly like it used on a group of percussion, or a group of vocals. Or both (done separately)!
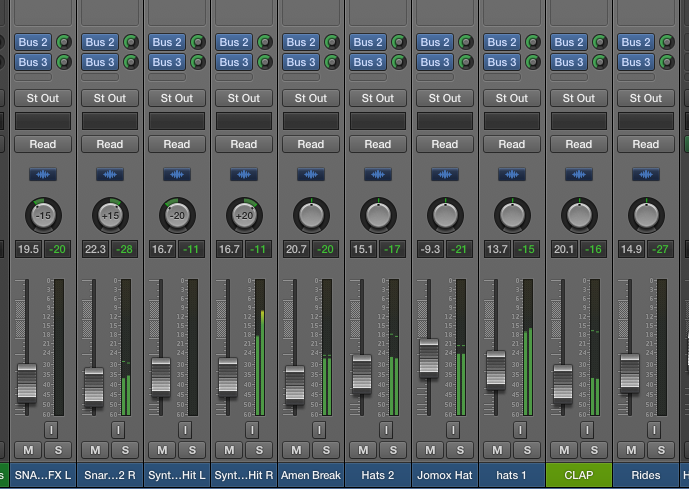
In this example, I am using Parallel EQ on the Percussion to make it feel even more alive. If we are making music electronically / in the box, we must remember to humanise it and make it feel more alive somehow… And this is a great way to do just that.
I firstly select all the percussion (not including the Kicks) and use a send / group, to send part of the signal of all percussive elements to two separate busses / groups, which are then sent to the main output, whilst also keeping the sounds intact where they were originally too. So essentially creating three layers of the same sounds.
Then, I add an EQ plug-in to each group and slightly enhance / subtract certain frequencies on each, ideally subtly and different to each other, for this example I am just using the Logic stock EQ. Then, we pan one group Left and one group Right. I usually do this around 20 + / – for each, so it isn’t obvious that this has been done, but still gives an amazing added depth to the sounds alongside the original sounds that are still in their original pan place (mostly in the middle with a few subtly panned left and right).
It is similar to parallel compression, but because we are adjusting different frequencies on the EQ of each Left / Right group, which is layered on top of the original sounds, it gives a feeling of more spaciousness, and depth, as well as more width to the tracks. And because they are panned left and right it means each side is slightly different, creating even more feeling of humanisation and realness, even with digitally made sounds, and also avoids any phase cancellation from grouping the same sounds.
Paralle; EQ works particularly well on percussion groups, and vocal groups, when there are multiple layers that can be sent to the Left and Right busses. I like to use it quite subtly but you can experiment with using it more obviously too. It can also work well on synth layers as well.
Hot Takes On Producing Music

Hot Take 1: Dj’s who learnt their craft playing long sets and warm ups in empty rooms, building it up until it got busier are not respected enough.
Hot Take 2: Remember all early house music often used only 8 track recording. So try and challenge yourself to using a less is more approach when making music, for a timeless feel.
Hot Take 3: AI aint got soul. And I truly believe artists who are authentic, true to themselves, and making music from the heart, will be the ones who stand out in the future.
Hot Take 4: The most important creative tool in my music production process is meditation.
Hot Take 5: The scene seems to be splitting into two; overly hyped big room visual moments with lots of crowd filming on phones, and heads down no phones there for the vibes places.
The post How It Was Made: Ceri – ‘Can’t Pay My Bills’ (Find Your Own Records) appeared first on Magnetic Magazine.