


Manchester duo BLND team up with Dutch vocalist Sirolf on Style Is Rude EP, a four-track release arriving via Dionysus Records. The project sits at the intersection of club-focused production and vocal-led songwriting, balancing stripped-back grooves with melodic restraint. Across the EP, the emphasis remains on pace, rhythm, and functional arrangement rather than maximalism.
BLND’s production approach leans into classic house and tech-house foundations while maintaining a contemporary mixdown and arrangement style. Their tracks favor clear rhythmic intent, economical sound selection, and subtle movement over constant variation, creating space for vocals and groove to coexist without competition. Sirolf’s contributions bring a grounded, conversational delivery that cuts through the instrumental framework without overpowering it, anchoring each track with a human presence that feels intentional rather than ornamental.
Rather than relying on heavy layering or complex structural shifts, Style Is Rude EP focuses on refinement and control. Each track is built around a small set of core elements that evolve gradually through automation, dynamics, and arrangement choices. This measured approach gives the EP cohesion while allowing individual moments to stand out, setting the stage for a closer look at the production decisions and tools used throughout the release.
KORG M1
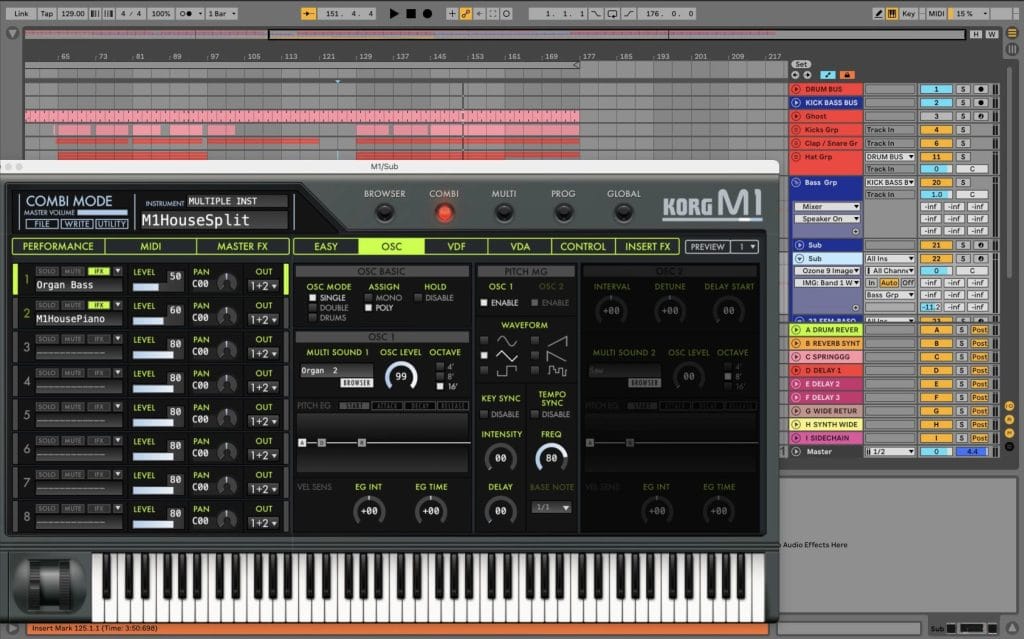
The Korg M1 DAW plugin is a classic software recreation of the iconic hardware synth that helped define loads of late-80s and 90s records. The plugin drops straight into Ableton making it easy to reach for when you want to add those classic, recognisable sounds to your work. Loaded with hundreds of presets, you can instantly find something to inspire your project.
On this track, we used the legendary KORG M1. We wanted to create that legendary organ bass which was used on old school records that influenced us from day one. We automated the filter cutoff slightly during the breakdown to let the harmonics breathe, then tightened it back up for the drop. Ableton’s Glue Compressor was used gently on the group to keep things controlled, with a touch of Saturation to add warmth and presence. We also sent the M1 to a short room reverb and tempo-synced delay to help it sit naturally in the groove without washing it out.
If you’re making house or tech-house, the Korg M1 is perfect for stabs, organs, and pianos that cut through a mix without much effort. Playing around with the filters and envelopes can instantly change the way a preset sounds so don’t be afraid to experiment! One trick we have learnt is to keep the sounds fairly dry in the plugin and handle most of the space in Ableton, which keeps everything tighter. Used sparingly and with intention, the M1 can add instant nostalgia and musicality to modern club tracks.
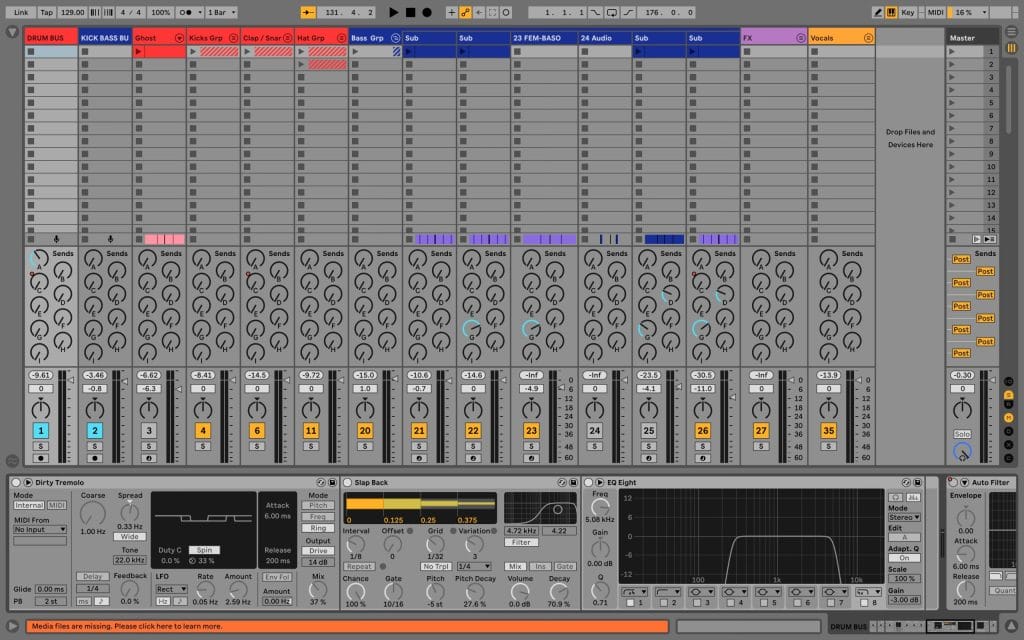
FABFILTER PRO-C2
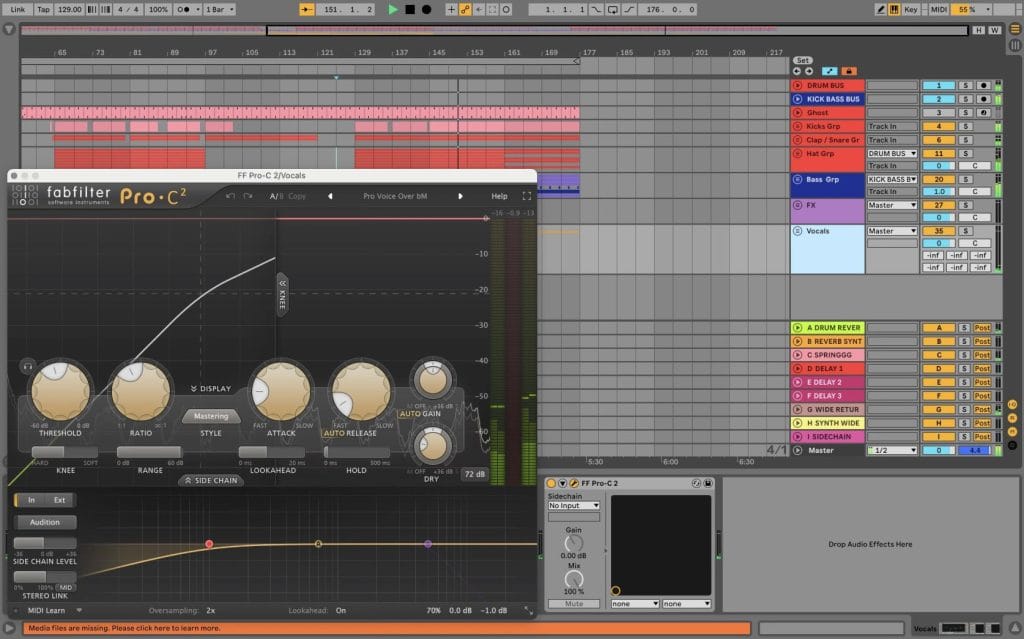
FabFilter Pro-C 2 is a clean, flexible, easy to use compressor that’s become a go-to for producers looking to control the volume and punch of their sounds. It’s perfect for making drums hit tighter and smoothing out areas which stand out too much. When grouping elements together, this plugin helps the sounds feel more “glued” together. The DAW’s interface is clear and visual, allowing you to actually see what the compressor is doing as you adjust it.
On this track, We used Pro-C 2 mainly on the drum bus in Bus mode, with a slow attack and medium release to let the transients punch through while still gluing everything together. We automated the threshold slightly in the breakdown to ease off the compression, then brought it back in for the drop to add impact. Sidechain was set to internal with the low frequencies filtered out, which helped keep the kick from over-triggering the compressor. We followed it with a touch of Ableton Saturator for weight, but
Pro-C 2 was doing most of the heavy lifting in terms of control and groove.
For house and tech-house producers, the Fabfilter Pro-C 2 is brilliant for adding subtle movements in your tracks without losing energy. The sidechain EQ is a secret weapon, especially for keeping your low-end clean and consistent. Once you get comfortable automating the threshold or mix knob, it becomes a powerful tool in your workflow for building dynamics across an arrangement.
FABFILTER PRO-Q3
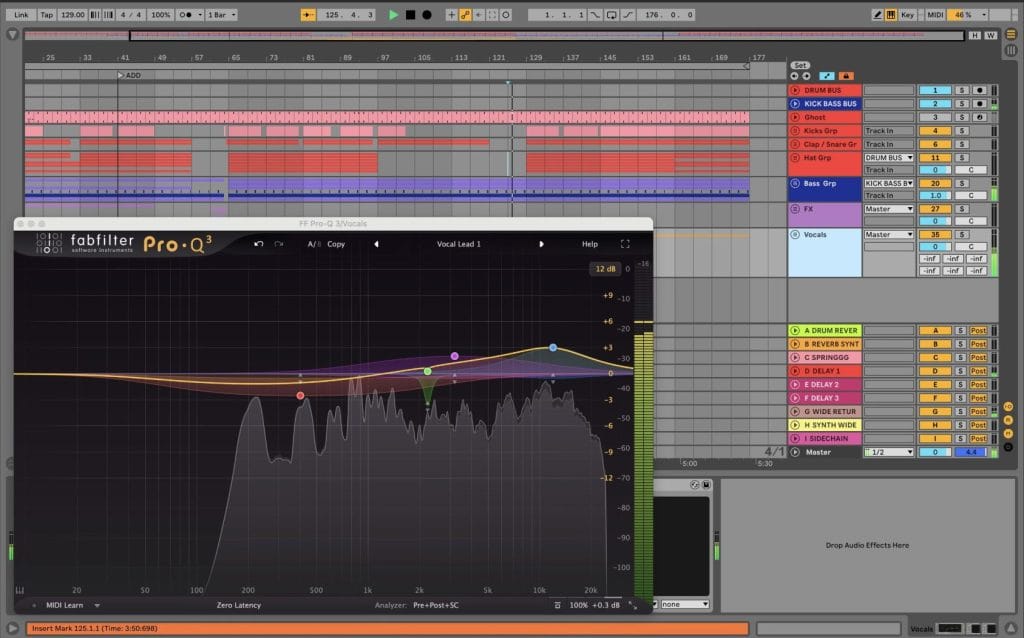
FabFilter Pro-Q 3 is a really straightforward EQ that helps you clean up and shape your sounds to your desire. It can be used to remove unwanted frequencies, make things sound cleaner or add a bit of top or low end where and when it’s required. The display makes it easy to see exactly what you’re changing which speeds things up a lot. It’s one of those plugins you’ll probably throw on almost every track without thinking.
On this track, we used Pro-Q 3 on most channels, starting with simple high-pass filters to remove low-end rumble that didn’t need to be there. We used dynamic EQ on a couple of synths to tame harsh frequencies only when they popped out, instead of cutting them all the time. On the drums, we made small boosts around the presence range to help them cut through, and a gentle dip where things felt boxy. Everything stayed pretty subtle, but it made a big difference to how clean and balanced the mix felt.
For house and tech-house producers, the Fabfilter Pro-Q 3 is perfect for keeping mixes clean without having to overthink it. Start with small cuts before boosting anything, especially in the low-mids where things can get congested fast. The Dynamic EQ is a game changer for controlling harsh sounds while keeping the energy of the track intact. Once you get used to making subtle changes with the plugin, Pro-Q 3 becomes one of the most effective and time efficient ways to get your track sounding professional.
OZONE 9 IMAGER
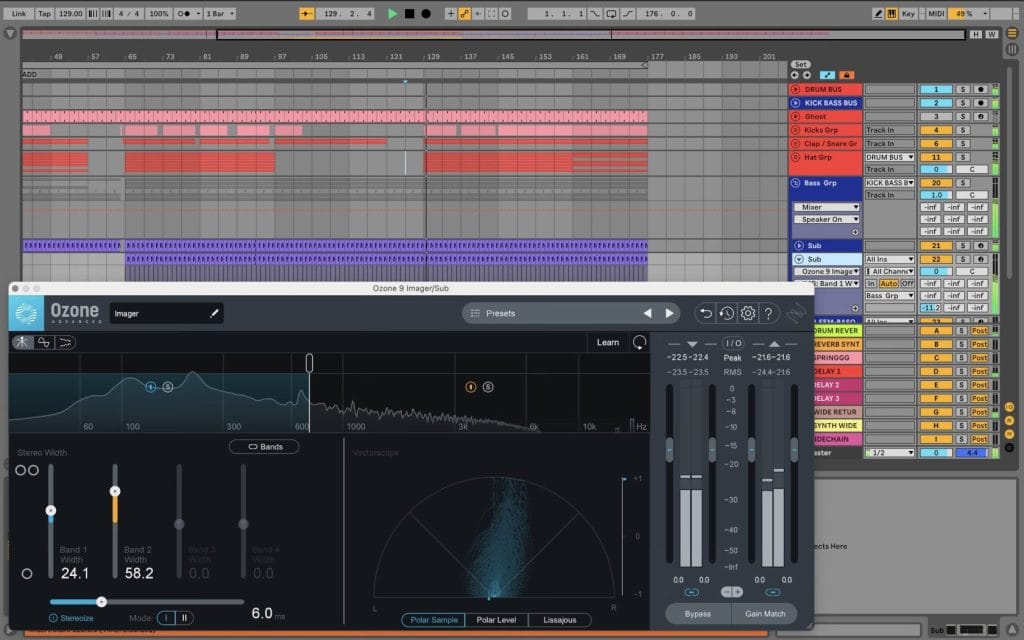
The Ozone 9 Imager is a simple tool that helps to control how wide or narrow your track sounds. It lets you spread sounds out to make the mix feel bigger or pull elements in to keep them tight and focused. You can split the sound into bands, so only certain parts get wider while others stay centred. It’s easy to use and visually easy to understand when you first open up the DAW.
On this track, we used Ozone 9 Imager on the vocal/tops and a couple of buses, mainly to add a bit of width to the mids and highs while keeping the low end solid in mono. I automated the width slightly in the breakdown so the track opened up, then tightened it again for the drop. The low band was kept at zero width to make sure the kick and bass stayed punchy and clean. We kept the settings pretty gentle, just enough to feel wider without sounding unnatural.
For house and tech-house producers, Imager is great for making tracks feel bigger without adding more sounds. Ensure you always keep the low-end narrow or mono and then focus adding width on your pads, synths and effects. Small moves go a long way with the Ozone 9 so avoid pushing the width too far as things can get messy. Used carefully, Ozone 9 Imager can really help your tracks feel more open and club-ready.

The post How It Was Made: BLND Ft. Sirolf (NL)- Style Is Rude appeared first on Magnetic Magazine.