


Production is all about nuance, and Black Pomade understands that better than most. His approach to electronic music blends precision with instinct, shaping tracks that are equal parts polished and raw. Whether it’s tightening up the low end with phase alignment or sculpting stereo width with Mid/Side EQ, his techniques focus on refining a mix without stripping away its energy. These aren’t just theoretical tricks—they’re the same methods he’s used to fine-tune his own records, ensuring every element sits exactly where it needs to.
If you’ve ever struggled with a mix feeling too muddy, too thin, or just lacking impact, these five production tips will help get things under control.
Black Pomade’s production philosophy is all about balance—keeping things clean but never sterile, wide but never washed out. These techniques are about making the small tweaks that separate an amateur mix from a professional one. Whether you’re refining your own sound or looking for fresh ways to approach mixdowns, these five production methods are essential tools to have in your arsenal.
1) Multiband Sidechain for Surgical Control

Traditional sidechain compression is a staple in electronic music, but full-band sidechaining can sometimes be too obvious and do more harm than good, especially when applied to basslines, pads, or leads. Ducking an entire sound every time the kick hits can make your track feel weak or empty. When I want to be a bit more subtle I like to use multiband sidechain compression.
Basically, instead of reducing the entire signal, a multiband sidechain lets you duck only specific frequency ranges, preserving clarity and punch where you need it.
- Bass & Kick Relationship: Instead of sidechaining the whole bassline, apply compression only to the sub frequencies (below ~100Hz) so the low end stays clean, while the mids and highs remain present.
- Pads & Leads: Sidechain only the lo-midrange of a pad while keeping the high frequencies intact, so the pad doesn’t disappear entirely when the kick hits.
- Vocals & Synths: If a vocal competes with a lead sound, use multiband compression to duck the synth’s presence range (~2kHz-5kHz) instead of lowering its overall volume.
This can be achieved using a FabFilter Pro-MB or even with Ableton stock plugins by creating a Rack with a multiband compressor for each band you want to process (for example Lo, Mid, and High).

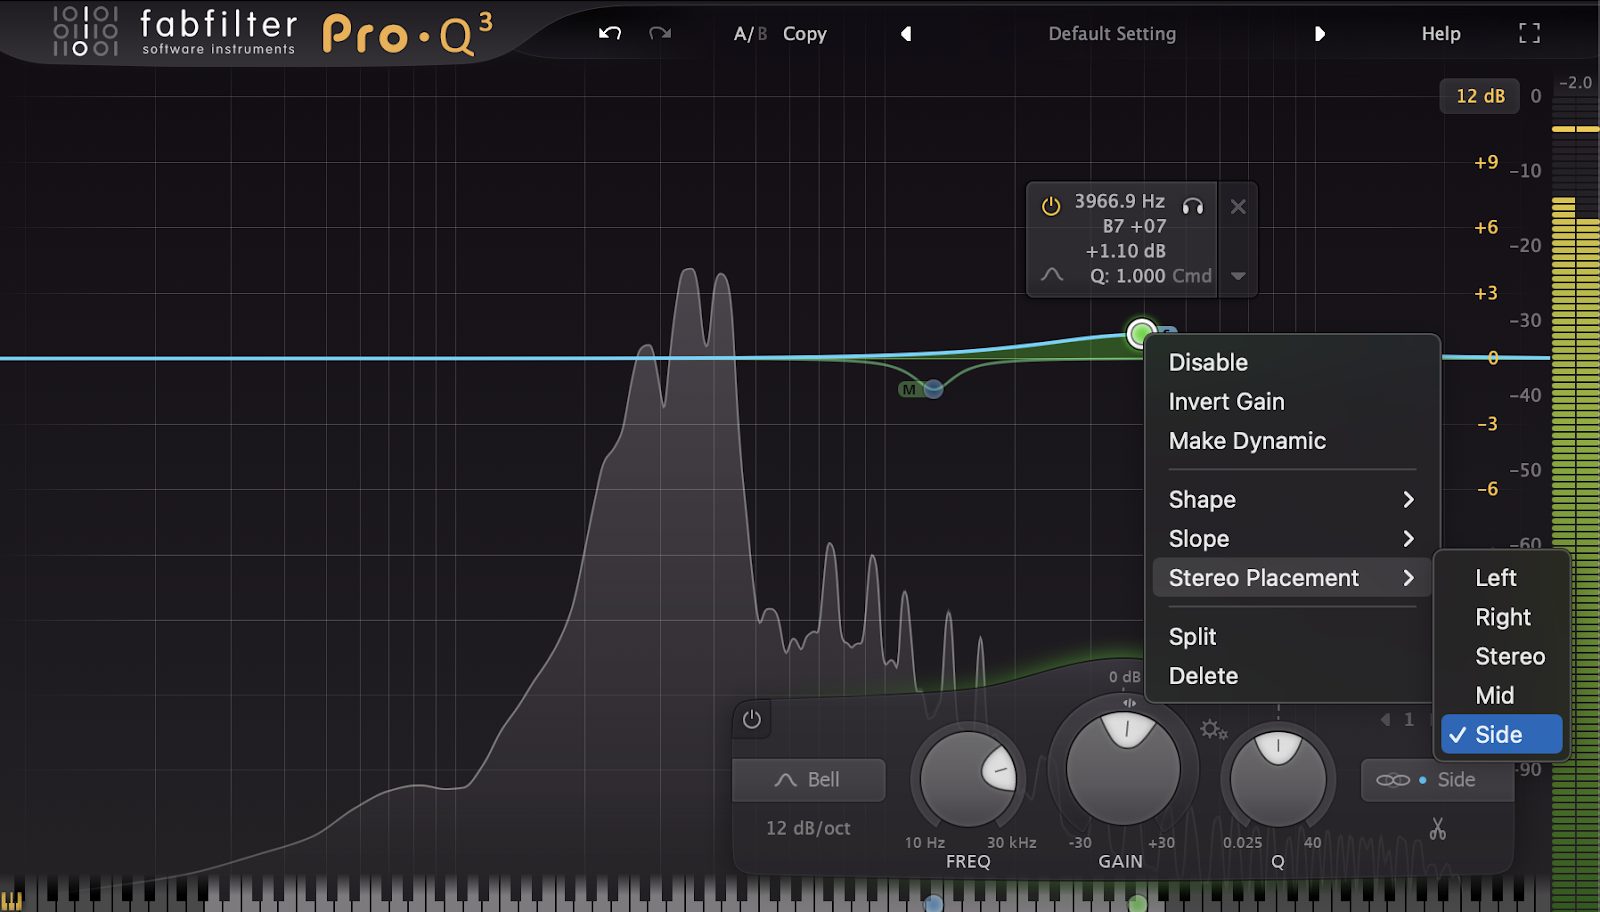
2) Mid/Side & L/R EQ for Stereo Sculpting
A wide, immersive stereo image is a hallmark of great production but it has to be done with precision. Instead of using generic stereo widening effects, Mid/Side EQ and Left/Right EQ allow you to shape your mix with more intent.
Mid/Side EQ
- Boosting high mids (3-5kHz) only on the sides can make pads, reverbs, and atmospheres feel more expansive without interfering with elements in the center.
- Cutting sub frequencies on the sides can tighten the low end, preventing muddy stereo spread.
Left/Right EQ
- Slightly boosting different frequency bands on each side can create a subtle yet effective widening effect without phasing issues. For example a hi-hat loop with a 1-2dB boost on the right at 8kHz and a small dip on the left at the same frequency creates a more natural stereo feel.
I’m a FabFilter fanboy so their Pro-Q 3 EQ is my go-to tool for this kind of intervention. Always make sure to test the mono compatibility of the track when you mess with the stereo image, especially if it’s club-oriented!
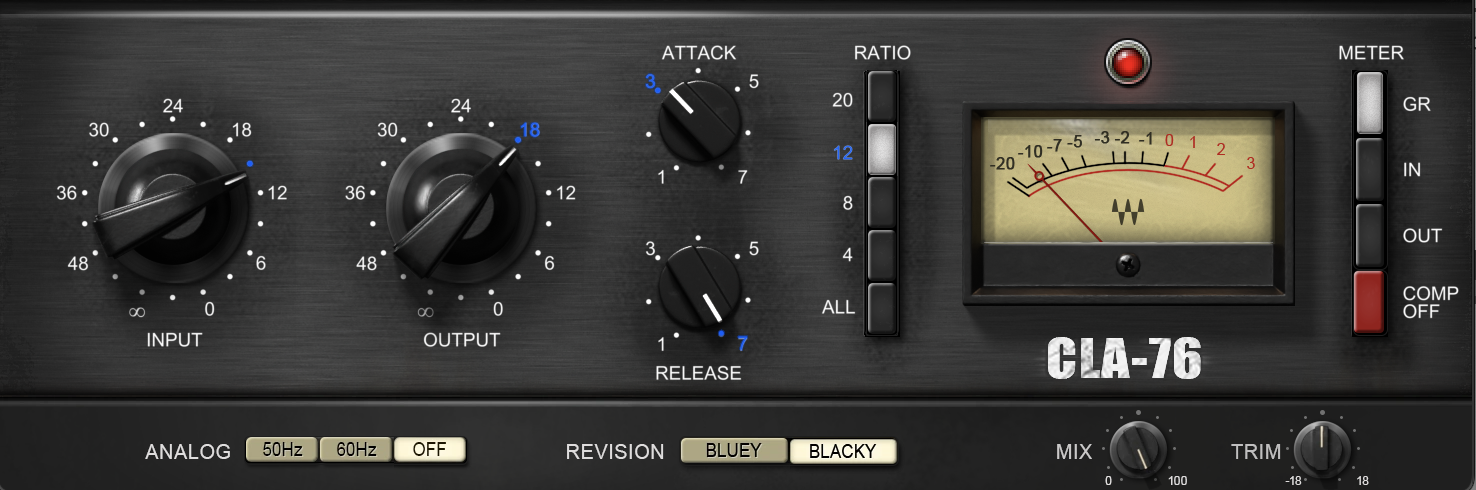
3) NY-Style Parallel Compression for Punchier Mixes
If your drums lack weight and energy, it’s time to use some parallel compression, also known as New York-style compression. This classic studio trick blends a heavily compressed signal with the original sound, maintaining both dynamics and impact.
- Send your drum bus (or individual elements) to a parallel channel.
- Apply aggressive compression with a high ratio (~10:1) and low threshold.
- Boost makeup gain so the compressed signal is loud and saturated.
- Blend it subtly with the dry signal until the drums feel fuller and more powerful.
- Optional: Add saturation or harmonic distortion to the parallel signal to further enhance warmth and presence.
For this example I’m using the Waves CLA-76, a 1176-style compressor
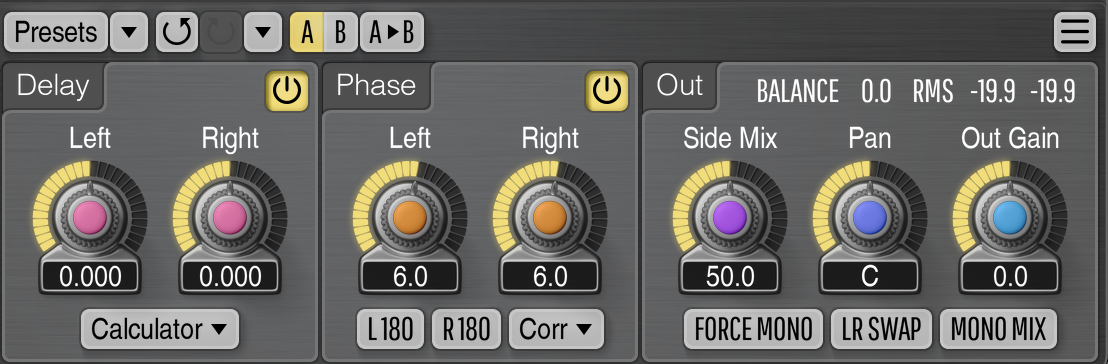
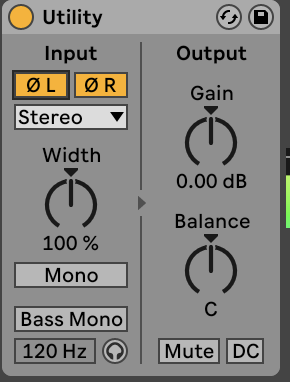
4) Phase Alignment for a Tighter Low End
Even if your kick and bass are in key, they can still sound weak or thin due to phase cancellation. Waveforms need to be aligned properly to avoid frequencies canceling each other out.
How to Check for Phase Issues
- Zoom in on the waveforms of your kick and bass, if their peaks and troughs don’t align, they might be out of phase.
- Flip the phase of your bass using your DAW’s utility plugin and listen for a difference.
- Manually nudge the bass forward or backward by a few milliseconds to find the sweet spot where it reinforces the kick instead of fighting it.
I normally use the Ableton Utility plugin for a simple phase flip, but if I need something a bit more surgical I use the Voxengo PHA-979.
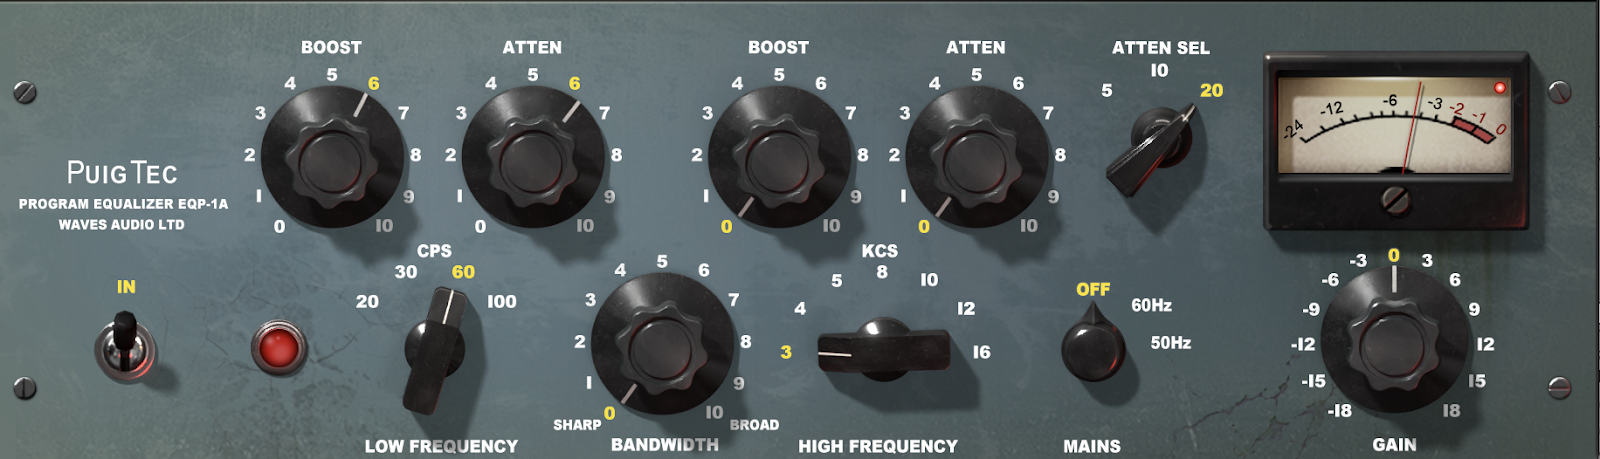
5) The Pultec Trick for Fat, Warm Lows
The Pultec Trick is a legendary EQ technique that boosts and attenuates the same frequency at the same time. This creates thicker, deeper bass without adding muddiness.
- Load up a Pultec-style EQ like the Waves PuigTec
- Select 30Hz or 60Hz in the low band, this will depend on where your kick or bass sit.
- Boost the frequency while simultaneously attenuating it.
- The boost adds warmth, while the cut removes excessive boominess resulting in a tight but powerful low end.
Works great on kick drums, basslines, and even vocals to add weight without overwhelming the mix. This trick has been used for decades in professional studios and remains one of the best ways to sculpt a fat, warm, yet controlled low end.
The post How Black Pomade Balances Precision and Grit in His Productions appeared first on Magnetic Magazine.