


Press Images C/O: Pierre Daschier
Working on HALO gave Mosimann and Tribbs a chance to bring their studio chemistry into an actual release after months of traction from the Dream Track format. The project moved from a fun creative experiment into a full record that had its own pulse, its own shape, and a clear vision of how electronic production can evolve when ideas flow naturally. HALO arrived at the right moment for both of them, capturing a style that feels confident and fully formed.
The creative process behind the track reflected that same energy. Each section leaned on tools that have become central to their workflow, from Keyscape shaping the piano foundation to Sonalksis Creative Filter driving movement across the mix. Nothing here feels accidental. Every choice pushes the track toward a clear identity that stands out within modern electronic music.
This edition of How It Was Made walks through the exact tools, settings, and decisions used to build HALO. Everything below comes straight from the artist so you can see the workflow in full detail and apply similar ideas in their own sessions.
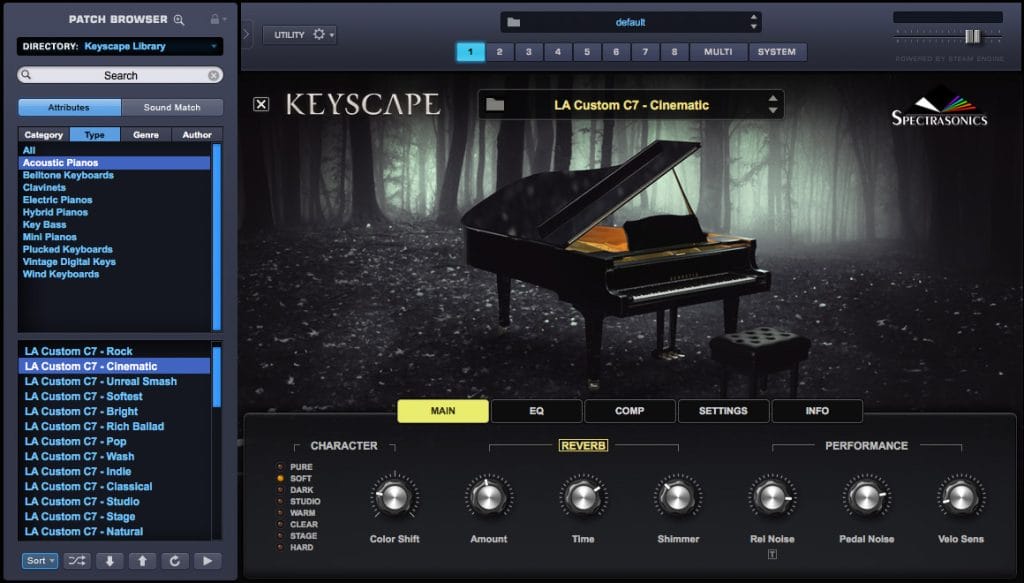
Keyscape
Keyscape isn’t another piano plugin. It is a meticulously sampled sonic powerhouse from Spectrasonics. Every note is captured with surgical precision, including velocity nuances, sympathetic resonances, and even the mechanical noises of hammers and pedals. The result is pianos that feel alive, responsive, and brimming with character. Whether you need the warm grain of a vintage Steinway or the crystal clear sparkle of a modern Yamaha, Keyscape delivers an unmatched palette of sounds, all wrapped in a user friendly interface that sparks creativity.
For HALO, I relied heavily on the “1955 NY Steinway D – Close” preset for its perfect balance of presence and depth. I recorded my Chopin interpretations live, then automated the “Tone Control” to shift the piano’s brightness throughout the track, moving from a soft, veiled tone to a more percussive attack during the climax. I maxed out the “Pedal Noise” parameter for added realism and followed up with a touch of Valhalla VintageVerb to place the piano in an immersive space without smothering the transients. To top it off, I layered in “Tack Piano” for a lo fi, organic edge, especially in the rhythmic sections.
If you’re producing electronic, ambient, or neoclassical tracks, Keyscape can be your secret weapon. Less is more. Start with a clean preset like “CP-70 Vintage” or “Rhodes Suitcase,” shape it with the built in EQ, and add effects sparingly. Pro tip. Automate the “Dynamic Response” to vary the keyboard’s sensitivity and create dynamic contrasts. And don’t be afraid to repurpose prepared pianos or vintage keys for unexpected textures. That’s how I found HALO’s signature sound.
Sonalksis Creative Filter
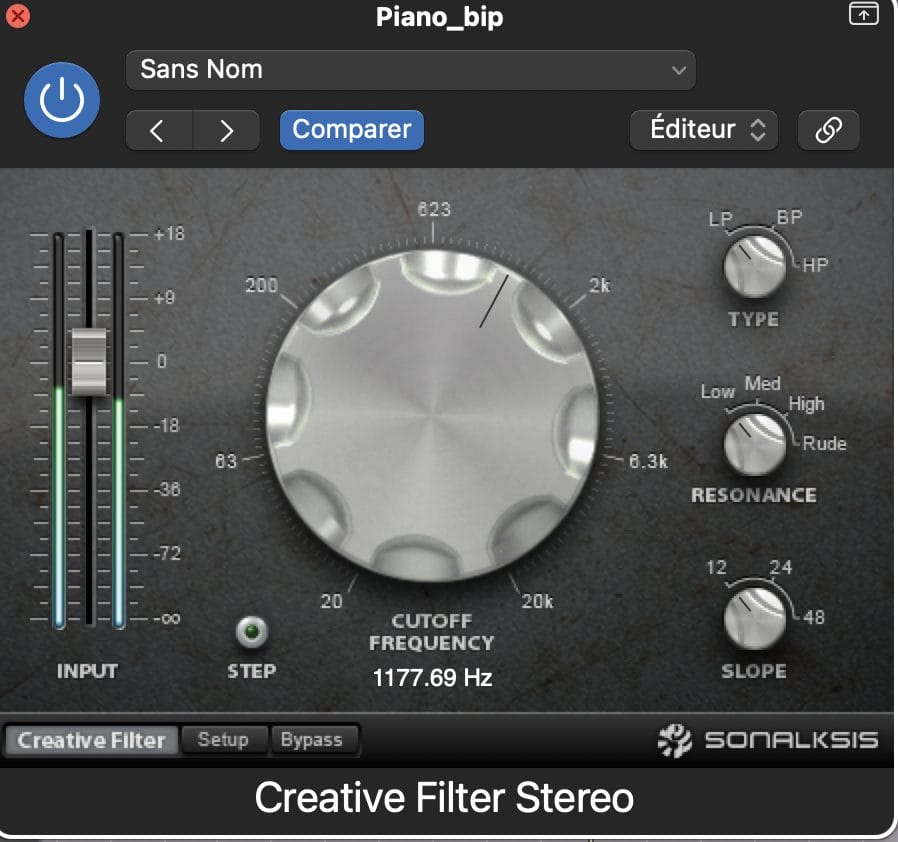
At first glance, Sonalksis Creative Filter might seem like another filter plugin, but it’s so much more. It’s a precision tool that combines surgical grade EQ, dynamic filtering, and intuitive modulation in a sleek, user friendly interface. What sets it apart is its ability to deliver everything from subtle tonal shaping to wild, rhythmic filter sweeps without feeling overwhelming. Whether you need a gentle high pass to clean up a bassline or a resonant low pass that pulses with your track, Creative Filter makes it effortless with a sound quality that is always musical and never harsh.
For my recent project, I used Creative Filter on almost every channel. On the main synth lead, I used the “Resonant LP” preset, automated the cutoff with a slow LFO to create a breathing texture, and then sidechained it to the kick for rhythmic movement. For the drums, I set up a “Dynamic HP” to tighten up the low end, using the built in envelope follower to duck the filter only when the bass drum hit. And on the vocal chops, I dialed in a “Notch + Width” combination to carve out space in the mix while adding stereo magic. The best part. It never felt like work. It felt like pure, intuitive sound design.
If you’re making electronic, ambient, or pop, Creative Filter deserves a spot in your toolkit. Start simple. Use it to clean up muddy lows or add air to your highs, then dive into modulation for movement and energy. Pro tip. Automate the “Q” parameter to create tension before a drop or breakdown. And don’t overlook the “Mix” knob. Blending the filtered and dry signals can add depth without losing punch.
Kilohearts Trance Gate
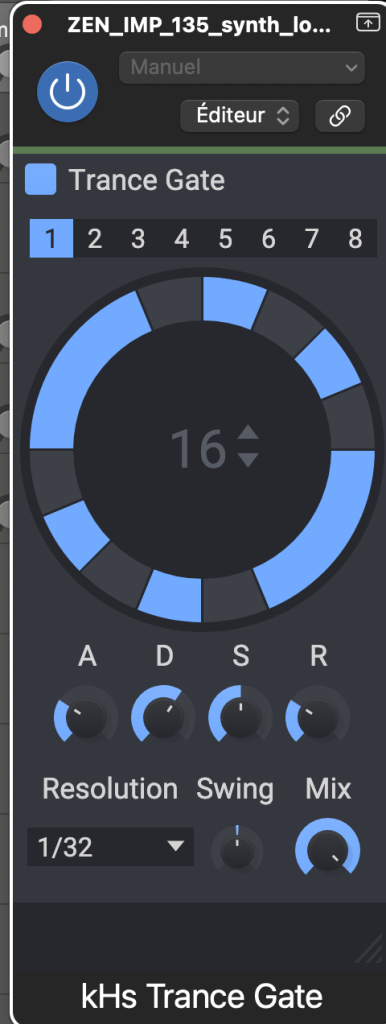
Kilohearts Trance Gate might look like a simple effect at first, but the plugin is a powerhouse designed to chop, pulse, and rhythmically transform any sound with precision. It delivers that signature trance gating that defined an era. Think stuttering leads, pumping pads, and sequences that move with infectious energy. It blends retro gated textures with a modern polish, which works perfectly in classic trance and modern electronic tracks.
I use Trance Gate on nearly every lead and pad sequence. For my latest track, I loaded it onto a supersaw lead, dialed in the “16th Note” preset, and tweaked the “Gate” and “Smooth” knobs to create a tight, rhythmic stutter that locked with the kick. On my ambient pads, I switched to “Dotted 8th” for an undulating effect, then automated the “Mix” parameter to slowly introduce the gating before the drop. The result is a sound that feels nostalgic and fresh, with that recognizable Kilohearts punch.
If you’re producing trance, progressive, or any style that leans on rhythm and movement, Trance Gate is a strong addition to your workflow. Start with the built in patterns, then tweak the “Swing” and “Offset” settings to match your groove. Pro tip. Layer it lightly on reverb tails or delays for rhythmic interest without pushing the effect too far.
Baby Audio Transit 2
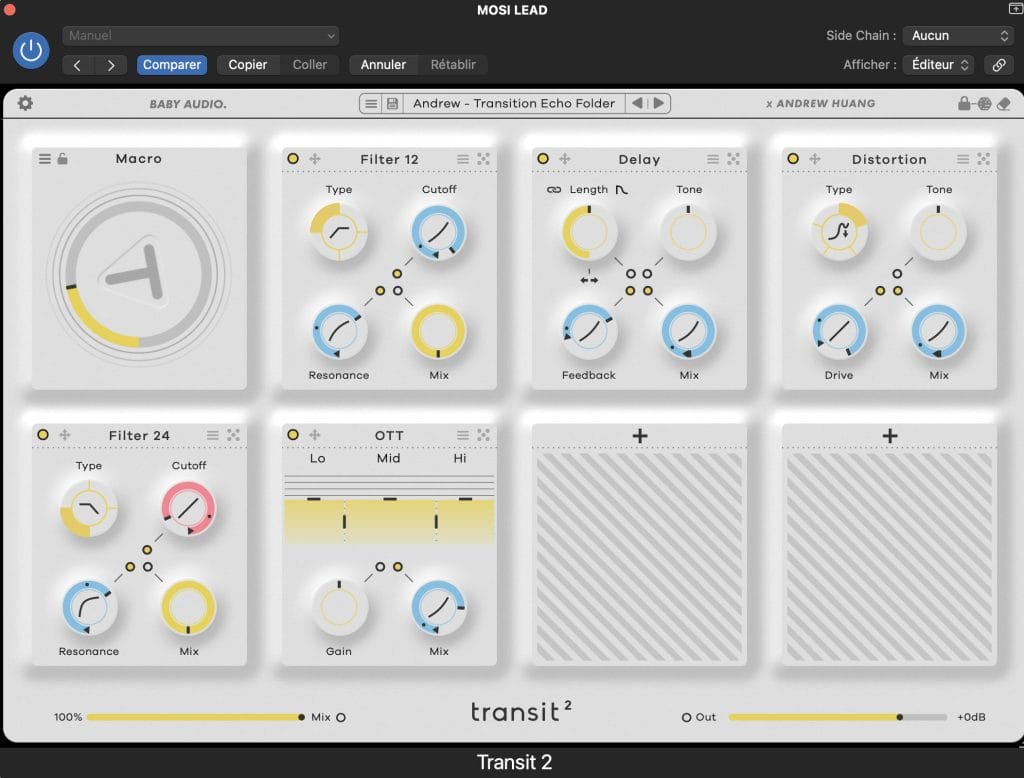
Transit 2 might look like a transition plugin, but it is a full creative engine. It excels at build ups, sweeps, and drops, but its real strength comes from the little details. It adds movement and texture to nearly anything. From tape stops and vinyl noise to glitch stutters and reversed effects, Transit 2 reshapes sounds in a way that sparks new ideas.
I use Transit 2 in a wide range of situations. In my latest project, I used the “Tape Stop” preset to create a slowing effect on my synth leads before a drop, then automated the “Grain” parameter to introduce glitch artifacts. For drum fills, I layered the “Reverse” mode with a bit of “Bit Crush” to get an unusual uplift. And on pads, I added “Vinyl Noise” for an analog feel that sits neatly in the mix. Every preset is tweakable, so it becomes yours quickly.
If your workflow needs transitions with character, Transit 2 is a strong pick. Start with the built in transition modes, then explore creative layers like Grain or Pitch. Pro tip. Automate the “Mix” knob to blend effects in and out smoothly. The “Random” function can also spark new ideas and unlock directions you might not expect.
Quick Fire Tips for Making Electronic Music
Tip #1: Bounce your audio, mangle it, then bounce it again.
Tip #2: Layer your leads with subtle detuned duplicates and a touch of chorus for width and movement.
Tip #3: Automate everything. Filter cutoffs, reverb tails, dry and wet levels on delays.
Tip #4: Use sidechain compression creatively. Not only on basslines.
Tip #5: Steal from the past. Chop vinyl crackle, tape stops, or retro synth stabs.
The post How It Was Made: Mosimann & Tribbs – HALO appeared first on Magnetic Magazine.