


Fresh off the release of his debut album Once a Blue Hour, Vraell breaks down the creative tools and production choices behind one of its standout tracks, “Waste.” Known for blending classical guitar technique with textural electronic elements, he walks us through the plug-ins, presets, and processing moves that shaped the song’s sonic palette.
In this in-depth look at the Waste DAW session, Vraell highlights how Native Instruments’ Massive became a core part of the writing process, how Waves Soundshifter allowed him to reshape vocals and guitars, and why plug-ins like Transient Master and the J37 tape emulator helped bring cohesion and warmth to his lo-fi recordings. Rather than following a strict formula, he leans into experimentation, subtle imperfections, and workflow habits that prioritize emotional tone over technical polish.
Below, Vraell shares a complete breakdown of how Waste came together—section by section, plug-in by plug-in—with screenshots and practical advice for producers looking to build similar textures in their own work.
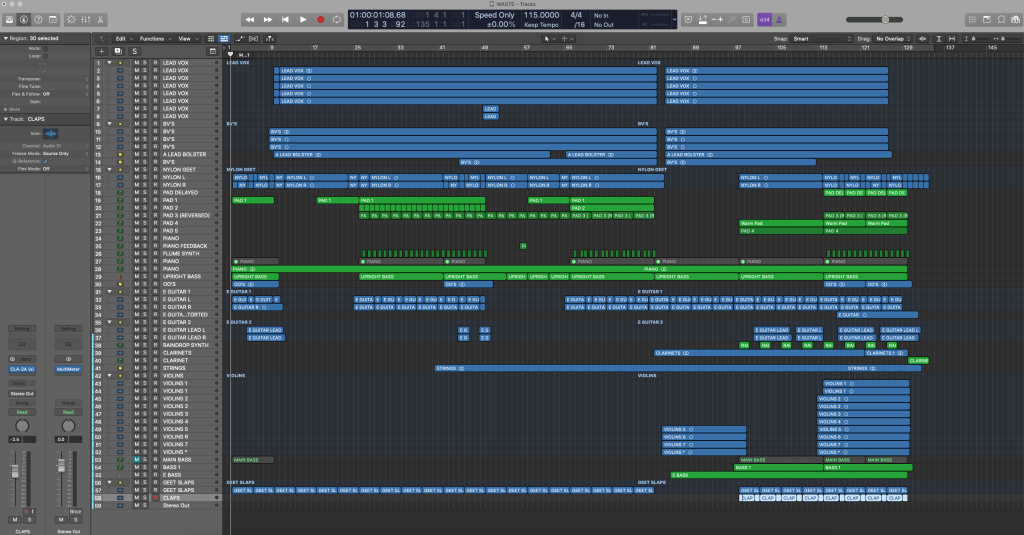
Native Instruments – Massive
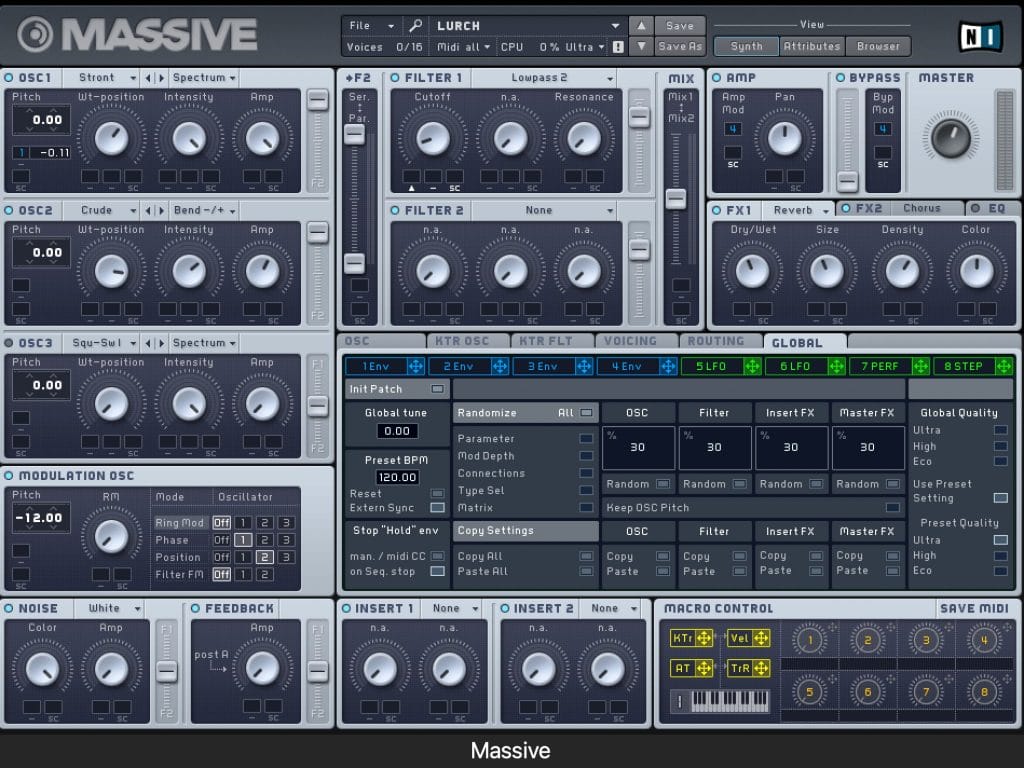
Massive has a steep learning curve, but once you break the synth down segment by segment, it becomes more manageable and rewarding as a process of creation. It’s my favourite subtractive synthesiser in my songs, and had a big presence in ‘Waste’. I’ve built all my favourite synths in here over the years, which have played a key role in my creative process. Waste was no different. Subtractive synthesis is the process of starting with the purest tone (sine, triangle) and tweaking and well, subtracting from this pure tone until you get something that’s interesting and full of movement.
The Lurch preset was very important in Waste to imply rhythm in a track without percussion. I utilised Massive’s pitch bend within the oscillator section. I basically put it up by 12 tones and down by 12 tones, which then allows you to go into Midi in your session and automate deep pitch curves, create harmonic colour, rhythm and sonic interest in the mid textures. The mids are so important for me, even if they are a nightmare to mix. That’s where the feeling comes from.
My advice for other artists on how to learn this synth for your own work is to just sit with it without judgment and make rubbish stuff for a week or so. YouTube have so many tutorials that give you the insight into how things work. I’m not very pure with my approach, whatever and however you can learn things sonically is the best way for you. Once you’ve moved past googling how to get that Burial bass sound (lol) then you’ll start to learn how things are made. I’ve only learnt in the last 5 years how to make an 808 from scratch. Plus it means you don’t have to be at the mercy of Splice. Which, in this day and age, I think is invaluable.
Waves – Soundshifter
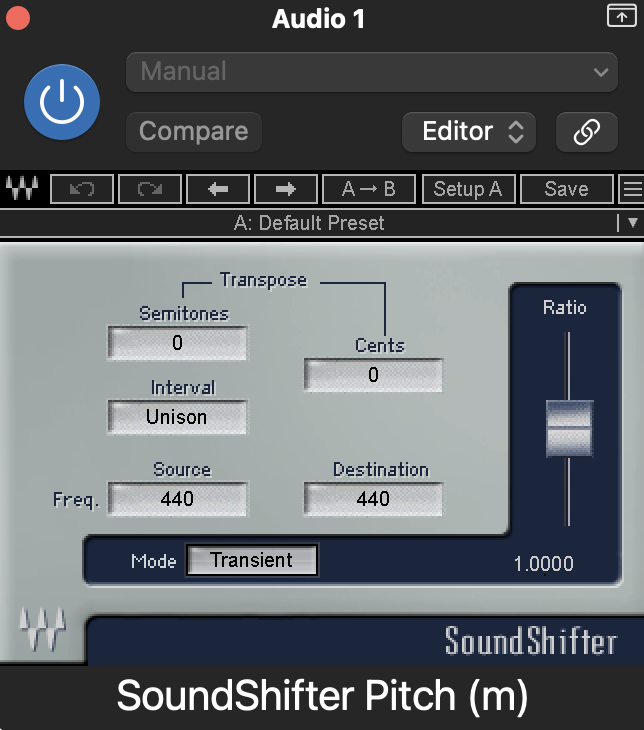
The Soundshifter is literally my favourite plug-in ever. I have never not used it. It’s basically a sound pitcher, and you can drop audio or MIDI by up to 12 tones. I found it’s the only pitch shifter that can quickly change the depth and tone of drums, vocals without it becoming tacky. I usually have a close link to Alterboy with the formant if I need a little bit of tweaking (usually vocals). Sometimes I’ll demo a song, put Soundshifter on it, bounce out elements and write again over it. You get such a wide range of tone and feeling with it.
I used Soundshifter mainly on vocals in Waste. I recorded 3 keys above and 3 keys below the original key, then would pitch them down with Soundshifter and put them wide and tucked back underneath the main vocals. That way, it doesn’t feel too clean. Kevin Abstract does it a lot, and I’m a big fan of the emotion he gets from how he processes vocals.
I also used it on the lo-fi percussive elements and the guitar. I played the guitar 2 steps up to gain clarity and intonation, then just pitched down, so you then get loads of width.
I’d have as much fun with this as possible if I were an artist experimenting with new things. Just do all your vocals through it and then record again. Literally cannot praise this one enough.
Native Instruments – Transient Marker
The Transient Marker is great for glueing sloppy percussive elements together. I saw Disclosure use it on their drum bus, and since then, I’ve found you can use it on pitched vocal samples and ambience that get a bit out of hand. It reigns stuff in and kind of locks it more into the demo mix. I kind of mix as I produce anyway, so this is one of those ones that helps shape the project.
This helped me tie in a lot of the messy folie samples I chucked into Waste. Stuff you record on your phone sometimes just has too much slop in it, so it just tucks it in and keeps it from overriding the guitars, etc. There’s a lot of grainy DIY recording going on in the project, and this just makes sure you retain sonic clarity with the lo-fi elements.
This one I’d recommend trying with a drum bus, or a kick or just a loop, just to hear how it kicks in and levels things out. Go to the extremities of the plug-in.
Waves – J37
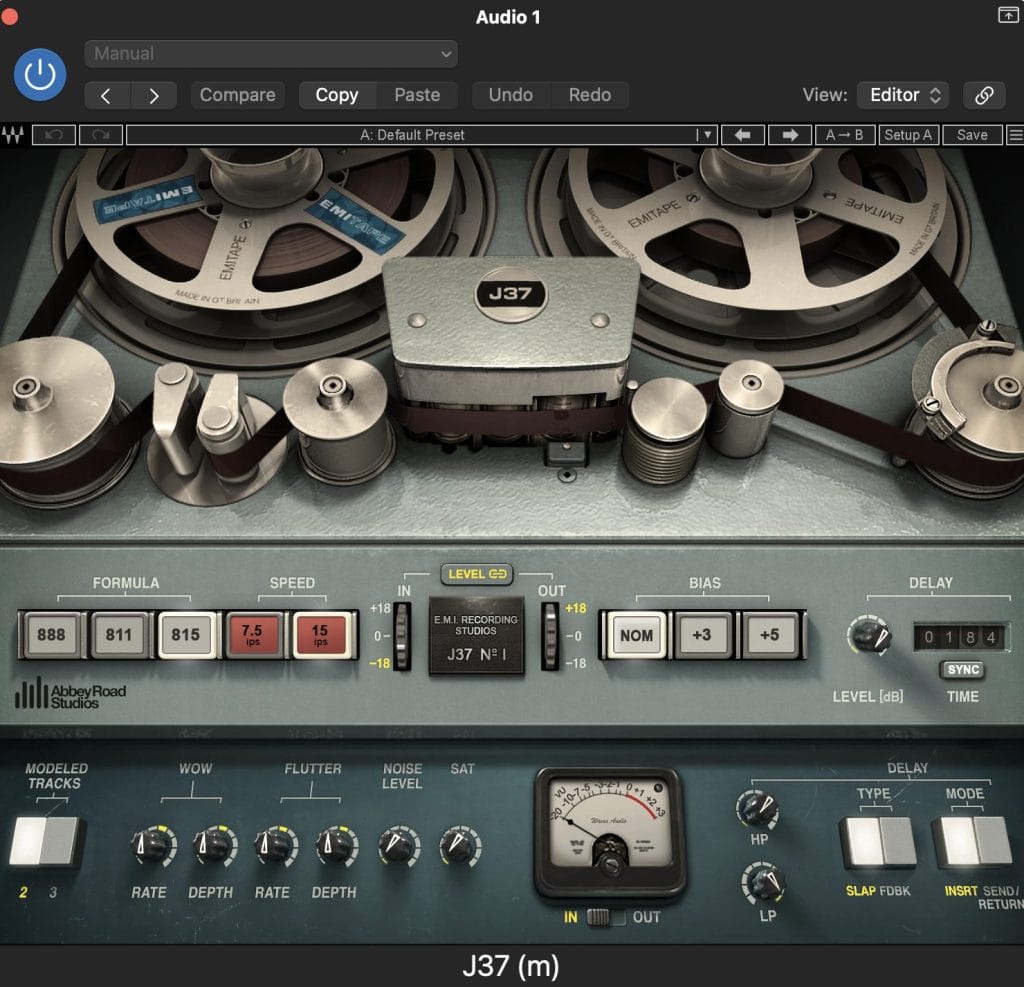
The J37 is just a tape machine emulator. You can get that hiss and character on stuff if it’s sounding too clean. I produce and mix in the box, so you really need to add warmth back in, otherwise it sounds so AI and bleh bleh. Plus, you can get a really good delay on it with some great fluttering. My favourite preset is Pads of Canada. Just because it has the best movement, and you can rein it in if you want it to be more conservative.
I used the J37 on all the synths and piano bass in Waste. Synths coming out of Massive often sound a bit too dancey and electronic, so it’s nice to bring a bit of hiss and warmth to them, without losing their depth.
I’d encourage just putting the J37 on your overall stereo mix sometimes. It’s the second-best thing to actually running everything out onto tape, which, when you’re on the move, is hard to do. Just make sure you don’t bounce stuff out until you’re positive about the noise levels of the hiss, because then you can get a huge buildup, and then you’re left with so much noise for the master.
Especially when elements of this genre require a lot of boosting because of quiet playing.
Vraell’s Five Quick Tips On Making Music
#1
Don’t be scared of having a big plugin chain on your ambience. Outcome is sometimes more important than process, and if you like the sound of it, go with it.
#2
The mids are the best part, get that plum at the start with synths and pads, even the guitars and worry about it later in the mix. You can always take away stuff further down the line.
#3
I actually love the stock amp plug-ins on Logic Pro X; I use them on my nylons all the time. Embrace elements of Lo-Fi because it gives your songs more heart and feel.
#4
Don’t be scared to pitch stuff down 24 tones, or more, even if it’s just adding subconscious movement in the track, that is everything for the listener. It’s great in this new wave of folk, which is electronically driven a lot of the time.
#5
I would encourage pushing stuff out of the mix and being braver in the surrounding textures. It makes the focal point of the track more interesting and more satisfying to dance with elements that jump out or float.
The post How It Was Made: Vraell – Waste (Nettwerk Music + Folk) appeared first on Magnetic Magazine.